Creating a bootable USB flash drive using UltraISO. Burn an image to an ultraiso flash drive: making the complex simple Installing windows 7 ultraiso
One of the most effective and efficient methods that allows you to record Windows installations, is to create a bootable USB flash drive using the UltraISO program. Before carrying out such an operation, you must download and install the application. You can do this by visiting the official website of the developer software. About how to burn an image to a flash drive via UltraISO, we will tell you in detail in our material.
Features of creating a bootable USB flash drive using the UltraISO application
After installing the UltraISO program, the user can begin creating a bootable USB flash drive. This process will not cause difficulties even for beginners. Developer software product I did my best to make it clear how to create a bootable USB flash drive using UltraISO. For clarity, we will provide detailed instructions.
First, you need to run the application for the flash drive directly as an administrator.
After performing this operation, you should use the Ctrl + O keys, or by selecting File - Open, open the image installation file Windows. We open exactly the image that needs to be mounted.

The next step is to specify the folder where the Windows image is located. To carry out this operation, select the image and click Open.

As a result, the following image should appear before the user’s eyes.

If everything is displayed correctly, then you can start recording the flash drive. You need to start such an operation from the item Bootstrapping - Burn image hard drive. The next screenshot shows everything.

Please note that when recording from a USB flash drive to automatic mode the information will be deleted. If the data is important, it should be saved first. At this stage, the operation looks like this – USB-HDD + and click Write.

The Ultra ISO software will issue a warning that the information will be erased. If the data is not important or the user has already saved it, then click Yes.

Is it possible to make a bootable USB flash drive using a DVD disc and how to perform such a process
It became clear how to use the Ultra ISO program. Now you need to figure out what to do in those situations when you have a licensed installation disk, but no Windows image. It's very simple. In the third point, marked in the picture, you should mark the path to the disk drive. To do this, select “File”, and then “Open DVD”.

The rest of the actions take place as in the images presented just above.

Is it possible to create a multiboot flash drive using a folder with files
Yes, this option can also be made a reality. He is optimal solution in situations where digital licensed copy is on a folder on the computer equipment on disk. To complete the work, follow the following instructions:
We launch the Ultra ISO program to create a bootable flash drive. Select in order: “File”, “New”, “Bootable DVD image”.

In the window that appears on the screen, select the file called bootfix.bin. It is located in the boot folder.

The next step is to select the folder where the files are located. All files should be moved to the window located at the top.

In situations where the indicator on the right (as in the picture below) turns red, you need to click on it with the mouse and select 4.7.

Next, the user must be guided by points starting from No. 5, which are marked in the screenshots above. After completing all the operations, you can be sure that the car bootable flash drive ready for further use.
Nowadays it is difficult to imagine a person who would not have a computer at home. Unfortunately, unforeseen circumstances may occur that can only be resolved by reinstalling operating system. This article will look at how to install an operating system on a flash drive using the UltraISO program, and how to install Windows 7 from a flash drive.
Preparing a flash drive for installing a Windows 7 image on it
Depending on the size of the image with the operating system, you need to select a flash drive of suitable size. After this, if you have any files on it, you need to save them on another medium, since (Important!) all data will be deleted when formatting and installing the system image.
After everything necessary files were saved from a flash drive, it needs to be formatted. To do this, go to My Computer, select the flash drive and, right-clicking on it, in context menu choose format. 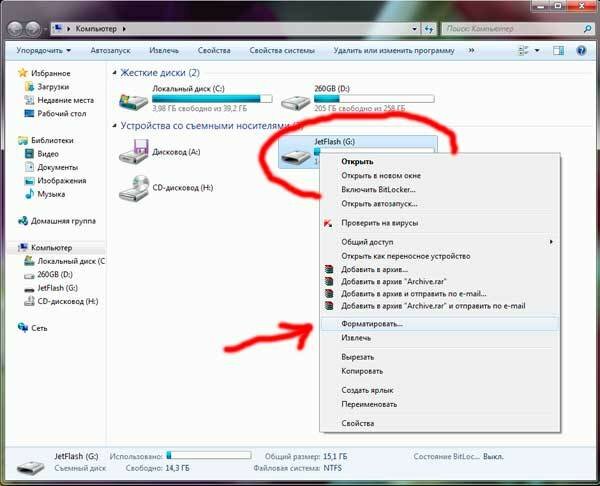
In the window that appears, in the “Capacity” section, you need to check the size of your flash drive. In the “File system” section, leave the NTFS format. In the “Cluster Size” section, leave it as default. Be sure to check the box next to “Quick Format”. After completing the procedures, you must click the “Format” button and confirm the start of the procedure. When finished, a window with a completion message will appear. The flash drive is ready to burn the image.
Installing the UltraISO program
First of all, you need to download the program distribution kit. It is recommended to do this from the official website of the developer. When the UltraISO program is downloaded, run the file.
In the window that appears, you must accept the license agreement and click next.
After this, select the path where the program will be installed or you can leave it as default.
Don't forget to sign UltraISO, as it should appear in the Start Menu. After this, specify the necessary parameters:
- shortcut on your desktop (usually needed to quick access to the program);
- associate the .iso file with UltraISO (it is necessary to check the box next to this item in order for .iso files to be opened using this program);
- install ISOCD/DVD emulator (allows you to install virtual drive, with which you can open .iso files).
 When all the settings have been made, click the “Install” button. After completing the installation of UltraISO, in the window that appears, click the “Finish” button. The installation is complete and the program is ready to use.
Burning an operating system image to a USB flash drive using UltraISO
Before Windows 7, you need to make sure you have an image file with the .iso extension. If there is none, you need to create it from disk or download it from the Internet. In order to do this, you can use any image creation program or make it in the UltraISO program. To do it in this program you need:
- Insert the disc with the operating system and run UltraISO for a trial period.
- In the program, find the image creation icon, or Tools/Create CD image, or press the F8 button on the keyboard.
- In the window that appears, you need to select the drive on which the system is installed, the location where to save the image file, select the .iso format and click the create button.
 After completing the process of creating a Windows 7 distribution, you need to write it to a USB flash drive. To do this, without leaving the UltraISO program, click File/Open, find our downloaded system image and click “Open”.
After that, go to the Boot/Burn Hard Disk Image menu. 
In the window that opens, you need to select your flash drive in the Disk Drive field and format it again, and only then click the “Burn” button. 
In the next window you need to confirm the continuation of the process. We are waiting for the installation to complete, after which we press the “Back” button and close the UltraISO program. Operating room image Windows systems 7 installed.
Setting the flash drive to boot into BIOS
When you turn on the computer, you must enter the BIOS using the Delete (Del), Esc or F2 buttons on the keyboard to set boot priorities. Be sure to insert the flash drive before turning it on, since there are cases that some equipment does not detect this type of media and may simply not see it if it is inserted after turning it on.
After you have entered the BIOS, go to the Boot tab and set the startup priority of USB-HDD first. As a rule, everything is changed using the F5 and F6 buttons, but it can be different (on the right it will be indicated how you can change). 
Installing Windows 7
Let's proceed directly to installing the operating system on the computer. When exiting the BIOS, the computer should restart and a prompt will appear asking you to press any key to continue booting. If this does not happen, it means that either the information on the flash drive was written incorrectly, or the drive cannot read it, or the settings in the BIOS were not saved.
After pressing any key, the necessary Windows 7 files should begin downloading. After this procedure is completed, a window will appear with a choice of language and keyboard layout. 
Select the required parameters and click next. In the next window, click the “Install” button. The operating system selection will then appear. Having selected the Windows 7 we need, click next. 
Be sure to agree to the license agreement and continue by selecting the full installation.
The window that appears will present a list of disks on which you can install your system. Before installation, be sure to configure the desired disk. To do this, click on the “Disk Settings” button at the bottom (in the English version “Drive options”). 
On the selected one, click the “Format” button to delete all data. It must be formatted in NTFS format. After formatting is complete, select the disk and click next. The installation of Windows 7 will begin.
During installation, the computer may be restarted, and the process will continue after that. When the installation is complete, the system will download the latest installed system and will configure the first Windows startup 7, will check the performance of the video adapter.
After this, a window will appear in which you must specify the Username and Name of your computer. 
In the next window, you must enter the product key, or uncheck the automatic registration on the Internet. Click next. The system will then offer to automatically protect your computer and Windows 7 by installing updates. In general, it is recommended to select "Use recommended settings." 
Next, set the time and date on the computer. After which there will be preparation of the desktop and final Windows boot 7. Now you just need to install the necessary drivers and programs. The installation is complete and the computer is ready to use.
It's no secret that optical drives in the form of CDs or DVD disc ov are losing ground in terms of their popularity due to the availability of inexpensive USB flash drives impressive capacity and high-speed Internet access. A significant part of new computers, laptops, netbooks... are not even equipped with appropriate drives. Today we will look at how to install Windows 7 from a flash drive. In other words, we are interested in the process of creation bootable flash drive.
So, there are several programs for recording the distribution Windows 7 on a flash drive, but we will not use specialized software, but will use a regular utility for working with ISO images - “ Ultra ISO" Surely you have already created, edited and burned ISO files - this program can do all this and is a universal tool for working with disk images. The program interface is very simple, reminiscent of a “dual explorer”, in one part of which you can navigate through files and folders on your computer or laptop, and the second part displays the structure and contents of the open or created folders disk image. Everything is intuitive, there is a Russian version of the program, so you shouldn’t have any problems using it.
How to burn a Windows 7 image to a USB flash drive:
1. Download, install and launch Ultra ISO. Insert the USB flash drive into the computer.
2. Use Explorer to find the corresponding ISO image, right-click on it and select “ Open with >>> Ultra ISO" You can find the image through the menu " File >>> Open"from UltraISO itself - there is no difference.
3. In the menu of the utility you are using, select “ Burn a hard disk image"from the top menu "".
4. In the window that appears, select the flash drive you want to use. burn Windows 7 image(this is done in the “Disk Drive” drop-down list). Select the recording method “USB-HDD+” (although it should initially be set this way). Those interested can check the “Check” box so that after recording, a comparison procedure between the distribution package recorded on the bootable flash drive and the source ISO file will be initiated.
5. All that remains is to press the “ Write down» to obtain a bootable USB flash drive.
That's all - the procedure is “simple to the point of disgrace.” On the above screenshots the whole process is visible. It’s worth doing this once and in future questions about writing a Windows 7 image to a USB flash drive It shouldn't happen to you. It is only worth noting that before recording the distribution, everything available on USB Flash Drive the information will be destroyed.
Further installing Windows 7 from a bootable USB flash drive follows the usual scenario, with the only difference that in the BIOS you need to select flash drive as the primary boot device. There is probably nothing more to add - success in the high-speed installation of Windows 7 (fast compared to using a DVD).
Today we’ll look at the topic in more detail about... There are several ways to mount operating systems on a removable USB drive. Using programs (USB/DVD Download Tool , WinSetupFromUSB, Rufus) and command line(cmd).
In general, the concept of development suggests that the more time passes, the more information technology is developing more rapidly. It is becoming increasingly important to store information on removable media no larger size.
Let's figure out what the advantage of, for example, a flash drive or external HDD is compared to optical media– disk:
- compactness;
- reliability;
- ease of use;
- possibility of repeated use;
- recording more data.
What you need to create a bootable USB flash drive
- Download an image (file with .iso extension) of the Windows 7c operating system from any available site. There shouldn't be any problems with this. If you don’t know what an image is, read the post about creating an image. There is an alternative option, to create it yourself, but I think it makes no sense to waste time and effort.
- Have a flash drive of at least 4 GB, since the Windows 7 distribution weighs about that much.
- ultraiso program. Don't be alarmed that it's paid. When you download and install, you will initially have access to trial version. This is quite enough to make a bootable USB flash drive for Windows 7 using ultraiso. If you wish, you can find a cracked version.
The first thing you need to do is format USB drive. Why is this necessary? Let's assume an 8GB flash drive that stores multiple files. Before recording a Windows 7 image, you need to structure the clusters. Formatting just removes everything unnecessary and prepares the drive for new entry files.
As you know, when buying a flash drive it costs file system FAT32. It is outdated, so it would be better to reformat it to NTFS. This system allows you to store files larger than 4 GB.
By default, formatting a flash drive in NTFS using Windows XP not available. You need to enable this option.
Connect the USB drive to the computer. Go to the "my computer" section. Find the flash drive and right-click on it. Select "properties" from the menu. We get to the “hardware” tab and select the desired drive. Then click “properties”, “policy” tab and check “optimize for execution”.
After confirming the actions, you will be asked to restart your computer. When you launch the formatting window, NTFS will become available to you. For Windows 7, these steps do not need to be done.
How to format a flash drive to NTFS
IMPORTANT! Before starting the formatting procedure, copy all files to another media. This procedure deletes all files.
The most common method is formatting using standard windows capabilities 7. To do this, click “start” - “computer” and in the “devices with removable media” tab, find the future bootable USB flash drive.
IMPORTANT! Be careful, choose the device on which you plan to record Windows 7 using the ultraiso program.
Right-click on it and select the command called “format” from the menu.

Click start and wait for the formatting procedure to complete.

This completes the formatting of the flash drive. Now you can proceed to the next step.
After installing the ultraiso program, launch it, click on the button trial period. This is quite enough to burn a bootable USB flash drive.

The program will start, you will see it appearance. Quickly skim and review the location of the main elements.
First you need to open the image itself with Windows 7. Click in top menu“file” – “open” or the combination CTRL + O. Select downloaded windows files 7 with iso extension.

Now that the image is open, move along the menu to the right, find the “bootstrapping” tab. Here you will need the menu item “burn hard disk image”.

- In Disk Drive, specify the bootable USB flash drive.
- Secondly, the second line automatically specifies the path to the file with Windows 7.
- On the opposite side of the recording method, be sure to check that the value is USB-HDD+.

By and large, when opening this window, there is practically no need to change anything, but still compare the parameters with those listed above in order to avoid unpleasant situations.
Note: The ultraiso program allows you to format a bootable USB flash drive. If you have not formatted the device, be sure to carry out this procedure! The steps of the procedure are described above.
Press the treasured record button. Wait for the recording to finish.

That's all, lesson - how to make bootable windows flash drive 7 via ultraiso finished. As you can see, there is nothing complicated. Now feel free to plug in the USB drive and . Choose to boot from a flash drive and enjoy the result of installing Windows 7.
Typically, many netbooks (For example, HP Mini, Acer Aspire One, Asus Eee PC) there is no internal drive for reading DVDs. For such a netbook you will have to use either an external DVD drive or a bootable USB flash drive"flash drive". In both cases you will need to make booting a netbook from an external device. Peculiarities netbook settings to download from external devices determined by a specific model.
Installing Windows 7 from a USB flash drive using UltraISO
- Insert the flash drive into the USB port.
- Open
Instructions for burning a Windows 7 image to a USB flash drive
- In the UltraISO program, in the File menu, click on Open, select and click Open.
- After making sure that the image is open, select Burn Hard Disk Image from the Boot menu.
- In the Disk Drive list, select your flash drive, in the Recording method: USB-HDD+ and click Burn
- In the window that appears about information destruction Hint, click Yes
- Wait for the recording to complete (from 5 to 20 minutes depending on the recording speed of the flash drive)
- Restart your computer without removing the flash drive from the USB port.
- Immediately after the restart starts, launch by pressing Delete (Del) or F2 on the keyboard, depending on the type
- Set to boot from USB-HDD first
- Save the settings and exit the BIOS. The computer will restart and begin booting from a flash drive
The installation is no different from installing from a bootable DVD, but there is one catch. When the copying and unpacking of files is completed, and the computer reboots for the first time, you need to start the BIOS again and set the boot priority back (by default from the hard drive). Otherwise, the download will start from the flash drive again.
Installing Windows 7 using an external hard drive (HDD External), similar to installing using a flash drive
Main differences:
- In BIOS it is necessary select boot from HDD(because external hard drive defined as HDD), To do this, in the priorities for hard drives, select your main external HDD). After the first reboot in the BIOS, restore the default hard drive priority value.
- Before installation, the hard drive on which it will be installed must already be partitioned into the necessary partitions (for example,), otherwise the external HDD will occupy the partition with the letter “C”. Which will create some inconvenience after installation.


