Creating an automatic program installation by entering the serial number. Automatic installation of programs. MSI installation file for Adobe Acrobat Reader
After reinstalling the operating system or purchasing a new computer, situations often arise when you have to spend time searching and restoring working applications. Multi-installer programs are designed to solve this problem. They will save the user from performing routine actions, and will also help to find and install the necessary programs in a matter of minutes. With their help, you can get a working set of the most necessary utilities on your PC or laptop.
Features of programs for automatic installation of applications
As a rule, application installers include antiviruses, instant messengers, browsers, archivers, office utilities, players, graphic editors and other types of software. Some of them have a pre-installed software base of more than 700-900 utilities. Almost every multi-loader provides a convenient search by category, name, rating and other parameters, and also has the ability to select the bit depth of programs.
Types of multi-installer programs
They are divided into several types:
- kits with a large software base;
- programs for creating your own assemblies.
Most of the applications in this set belong to the first type. They offer a huge number of popular utilities to choose from, which are known to almost every user. The second category presents more flexible tools that allow you to create your own software package for further installation automatically. In this case, the user can independently change the configuration of one or another utility included in the kit, which allows him to restore the working environment with the previous settings. Accordingly, the first group of downloaders does not require any skills: you just need to select the desired applications. In turn, the second category of programs is aimed at administrators and experienced users.
When working with a computer, the user often has to install various programs - an office suite, games, system utilities, graphics packages, etc. After formatting the hard drive again, a reasonable question arises: “How can I automate the installation of software on my computer?” In this article, we will look at methods that can be used to automate the installation of programs on user computers, and we will look at the programs that can be used for this. We will also point out the advantages and disadvantages of the considered methods and means.
Let's say that a user has an application whose installation should be automated. What options are there to solve the problem?
The user can:
- Use automatic installation keys.
- Write a script for automatic installation.
- Create a macro script for automatic installation.
Let us examine in detail each method, as well as the means that implement it.
Using autoinstall keys
Many installers allow automatic installation using special keys. In this case, no action is required from the user. All values will be set to default. Each installer has its own set of such keys.
The advantages of this method:
- high installation speed without user intervention
- the user needs to know exactly which installer and key is used when installing the program.
Writing a script for automatic installation
To write scripts, special programming languages are used - scripting languages. The most popular is AutoIt. Its main purpose is to automate work with the Windows graphical interface.
- run Windows and DOS programs;
- simulate pressing keyboard combinations;
- simulate mouse pointer movements and button clicks;
- move, resize and manage window display options;
- directly interact with the “control elements” of the window (get/change the caption, move, disable, etc. actions);
- work with the clipboard to transfer its text content;
- read, change and create registry keys and values.
AutoIt includes an interpreter and a script compiler. If you have written and debugged your own script, then it can easily be turned into a regular exe file that already works autonomously.
The advantages of this method:
- ability to write flexible scripts.
- the need to learn both the language itself and the Windows OS.
Creating a macro script for automatic installation
To create a macro, a special macro recorder program is usually used. The principle of operation of such a program is very simple - the program remembers the user’s actions and then reproduces them. It would seem that this is the ideal solution! But in reality problems arise. The point is that the macro created in this way is time dependent. Those. If you recorded a macro on one computer, and a month later you purchased a more powerful computer, then the installation speed on the new computer will be different. To put it mildly, such a macro will become inadequate - mouse clicks and keystrokes will not occur where needed. What to do? An interesting solution to this problem was proposed by Almeza in its MultiSet product.
Almeza MultiSet (www.almeza.com) is an automatic program installer. The program works on the principle of a recording device. The user only needs to install the application once while the MultiSet is in recording mode. MultiSet will remember all your actions and, after recording is completed, will generate an automatic installation package.
How does such a package differ from the macro discussed above? The fact is that when executing the script, MultiSet is guided by the windows that appear during installation. As a result, even if you buy a more powerful computer, the script will run correctly.
Since MultiSet can run files of any type with parameters, the two methods described above are easily integrated into it (using autoinstall keys and executing a written script, for example AutoIt). So this product will be useful for both IT beginners and experienced users.
The advantages of this method:
- ease of creating automatic installation packages;
- no special knowledge required when using.
- You cannot add to the created script.
In this article, we provided a brief overview of methods and tools designed to automate the installation of programs on a PC. We hope that the reader will use the above material in his daily activities.
Ivan ABRAMOVSKY
Buying a new laptop or computer is always a great joy, but this event is necessarily associated with the hassle of installing the necessary software. They cannot be avoided even with a complete reinstallation of the system, which sooner or later each of us has to deal with. Those who reinstall the system frequently often have their own disks with hand-created installers on hand for automatic installation. By running such an installer, after a while you can get not only a working operating system, but also all the necessary programs. But this approach has its drawback: many programs are updated frequently, so disks become outdated at an incredible speed.
In order not to waste time searching for the latest versions of programs on official websites, you can use web services to automatically install applications. Their idea is that the vast majority of users need the same applications: browser, IM client, media player, archiver, email client, etc. That is why you can find most of the programs you need on such services without wasting time visiting software catalogs or home pages. Fresh versions of programs are added to such services almost immediately after release, so you don’t have to worry about relevance.
In addition to the possibility of convenient download and installation, the web services discussed in this article offer some additional bonuses: automatic disabling of advertising modules during installation, quick downloading of updates for already installed programs, compiling your own lists of applications, synchronizing programs between several computers, managing autoloading via browser, etc.
⇡ Ninite
Ninite is the most famous web service for automatically installing applications, and its fame is not accidental. Unlike many other applications for searching and installing software updates, Ninite allows you to install and update programs in a completely automatic mode. All you need to do is on the main page of the service, check the checkboxes opposite those applications that you want to add to the system or update, and then download the installer generated by the service. After this, you can sit back or go drink tea.
Ninite will install the programs one by one without any questions asked. The installer will choose the most suitable version of the application - 32 or 64-bit, and if there are several interface languages, it will install the program in your native language. If the installer has any additional options, for example, it suggests installing advertising toolbars, all of them will be automatically skipped.
By the way, it was precisely because of this that at the end of last year CCleaner, Defraggler and other free programs from Piriform disappeared from the programs supported by Ninite. Software developers who make good money from installing toolbars filed claims against the creators of Ninite, and the latter had to remove popular programs from their service.
The installer generated by Ninite always downloads the latest versions of applications, so it can be used repeatedly not only to install new ones, but also to update existing ones.

In total, the service supports more than ninety popular programs, and their list is constantly expanding. Among them are four browsers, a dozen IM and VoIP clients, a dozen and a half media players, several applications for viewing and editing graphic files, a dozen office suites and programs for working with PDF documents, three archivers, popular codec packages and clients for services data synchronization. The list also includes applications that are in demand by many users, such as Evernote, TeamViewer, TrueCrypt, FileZilla, ImgBurn, etc.
While automatic installation has many advantages, there are also some disadvantages to consider before using Ninite. Due to the fact that the user does not go through each installation step independently, there is no way to influence the parameters. For example, you can't change the installation folder and drive, so if you're used to installing applications on a separate drive, this is worth keeping in mind.
In addition to the free web service, Ninite also offers a client that costs $9.99 (per computer) to automatically update applications. It runs silently in the system tray and immediately alerts you to updates to one of the supported programs.

⇡ Allmyapps
Allmyapps is positioned as an independent application store for Windows. The service offers thousands of applications, most of which are free. You work with it through the web interface, as well as using a utility for Windows, the interface of which is made in the Metro style.
As you navigate the site, you can create your own lists of interesting applications. These lists are displayed in the Allmyapps application. All programs added to the list can be installed with one click.

True, there is no complete automation, like on Ninite. For many applications, the installer will still launch, and you need to click “Next” and select installation options, but there are also programs whose installation is truly “quiet”.

If the program cannot be installed automatically, then after downloading, the message Click to install will appear under its icon, but if user intervention is not required, the installation will begin itself. It is worth noting that Allmyapps allows you to completely disable automatic installation. In order to fully control the process, you just need to uncheck Enable 1-click installation when available in the application settings.
On the my apps tab you can monitor the installation progress: while some of the selected programs are still being downloaded, others are already being installed.

Application lists are convenient because they are saved even after the programs have been installed. Thus, in case of reinstalling the system, you can always quickly restore your own set of the most necessary applications and install them with a few clicks of the mouse.
Allmyapps also analyzes all programs already installed on your computer and finds out whether they need to be updated. A list of software that requires updating is displayed on the updates tab. You can see the current and latest version of the program, the size of updates, and also update all applications with one click. The progress of downloading updates and installations is displayed in real time, and as soon as the program is updated, it disappears from the list.

Another interesting feature of Allmyapps is the synchronization of installed programs between computers. If you install the application on several PCs, then on the my devices tab, as well as in the section of the web interface of the same name, you can see a list of devices and applications installed on them (of course, only programs supported by the service will be shown). Allmyapps will compare the lists and offer to install the missing programs on other devices. This can also be done in batch mode by selecting the Install All command.

Allmyapps can also be used as a regular application launcher. All installed programs are displayed as large, visual icons, and the list of utilities can be sorted by name, installation date, and last run date.
Soluto offers a little more than just silent app installation. Using the service you can:
- track applications that start with the system and remove them from Startup,
- monitor the condition of hard drives and clean them,
- monitor the temperature of the processor and motherboard,
- monitor the battery discharge status on the laptop,
- control the security level of your computer,
- change the default browser, as well as manage installed plugins and browser settings.
All this can be done directly from the service’s web interface. Soluto also shows the laptop model and the name of the desktop motherboard, the operating system version and the time it has been running on the computer, and also calculates the computer's power on a scale of five.

To work with installed applications, Soluto uses the Ninite service described above. The client analyzes all installed programs and marks those that require updating. You can select some of them or mark all programs for update. Downloading and installing updates is completely automated, no dialog boxes appear. From the Soluto web interface you can also install the most popular applications: Skype, Picasa, OpenOffice, VLC, Adobe Reader, PDFCreator, Google Earth and others. The list, of course, is the same as in Ninite.

Soluto makes it possible to monitor not only outdated versions of applications, but also operating system updates. If automatic updates are disabled, the service reports this.

Of particular interest is the module for managing applications and services that start with Windows. In order for it to work, you must restart your computer at least once after installing Soluto. After this, the service will display information about how long it takes to boot the system, and will also divide all automatically launched applications into essential and non-essential.

The download of programs and services classified as mandatory cannot be disabled using Soluto, you can only view information about them. But for applications whose startup, according to the service, is not mandatory, you can choose one of two options: disable automatic startup and delay it. When you select the second option, the program starts automatically, but not immediately when Windows starts, but a little later. Thanks to this, the system startup time is reduced. The extent to which the launch was accelerated can be immediately seen in Soluto.

You can work with up to five computers within one free Soluto account. In the service control panel, you can add your own computers or work machines of other people who require technical support. If you add your own computer, you will need to log into your account and install the Soluto client.

When adding someone else's computer from the service control panel, the user is sent an email offering technical support. After the respondent downloads and installs the client using the link from such a letter, his computer data appears in the web interface. Now you can remotely view information about your computer, analyze emerging problems, update programs, etc. Interestingly, such remote technical support is carried out completely unnoticed by the user working at the computer. In other words, this is an excellent way to remotely monitor the state of the system and hardware of the computers of parents and friends who do not know how to install programs themselves.
If Soluto finds a problem that requires immediate resolution, the computer is marked with a special icon in the list of connected devices. When you go to the device, you can see that the detected problems are listed at the top of the page.

Soluto also monitors which applications are most likely to crash, cause memory problems, or consume CPU resources. Statistics are collected and displayed in a special section. After some time, you can analyze it and, for example, replace a media player that often crashes with another one.
Soluto pays special attention to installing Dropbox. Using the service, you can quickly install a client on a remote computer, using either your account information or information about another person’s account for authorization. Directly through Soluto, you can remotely download and install the Dropbox client on someone else's computer, as well as create a new account and send a user manual.

The same applies to Skype: right in the Soluto web interface, you not only install the client on a remote computer, but also enter authorization data, and, if necessary, create a new account.
We also note that the Soluto service is available as a Metro application for Windows 8.
⇡ Conclusion
Each of the services considered has its own advantages: Ninite is convenient in that the installation is completely automatic, and toolbars and other advertising things are disabled. Allmyapps offers a wider list of programs and allows you to sync installed applications between multiple devices. But Soluto, although it uses Ninite’s capabilities to detect updates and install new programs, also offers very interesting tools for managing startup and providing remote technical support for users.
Free automatic installer of any set of programs on your computer.
Attention! Some antiviruses (for example, AVG) report that the program contains a Trojan. In fact, this is not true (tested by other reputable antiviruses).
It’s just that the automatic installation functions of programs for particularly corrosive antiviruses may look like the action of a Trojan program.
If your antivirus does not allow you to install Easy AutoInstaller Free, it is better to look for some other program for your tasks.
You've probably encountered the need to reinstall your operating system more than once. But this is not the main problem - the main thing is to install all the necessary programs and not forget anything!
From my own experience, I know that installing software sometimes takes twice as long as installing Windows itself. Recently, many special disks have appeared with automatic installation of the necessary applications.
Is it possible to create such a disk yourself? Of course! There are many special utilities for this. But they are either paid or not very stable.
However, among the heap of similar programs you can find some pretty decent freeware projects. An example of this is Easy Autoinstaller FREE.
This program is intended for non-commercial home use and allows you to create startup disks with a set of the software we need without any problems! It can remember and then reproduce an unlimited number of times all the actions that the user performs when installing the required software.
Unlike the paid version, the free edition cannot create disks containing operating system files, but the functionality of Easy Autoinstaller Free is quite enough:
Comparison of the free version of the autoinstaller Easy Autoinstaller FREE with the paid version of Easy Autoinstaller PRO
As you can see, in addition to the restriction on creating a startup disk with the operating system, the free version blocks the ability to change the design of the autoinstall menu, as well as recording a script in “real time”.
The latter means that to record the next desired action in the script, you will have to press one of the function keys (left Shift or Ctrl). But more on that later, for now let’s install the program.
Installation Easy Autoinstaller FREE
The program installer, although in English, is built in a standard way, so after launching it, we will need to click “Next” all the time and agree with all the offers. Once the installation is complete, the program window will appear in front of us:

You can start working, but I would advise you to start by creating a folder somewhere into which we will move the software distributions and drivers we need. This will make it easier for us to create our own autoinstall disk in the future.
Creating an autoinstall script
Now let's proceed directly to creating auto-installation scripts. To begin, click the “Add script” button.

A window will appear in front of us where we should enter the name of the program that we are going to install. After confirming the entry (the “Ok” button), another window will appear in which you will need to specify the version of the application to be installed. In principle, you can enter anything you want into both windows, but for our convenience, we will indicate what is asked :).
After entering the program version, a window will open for selecting the installer for the desired program (remember, we put them in a separate folder;)).

Mark the required executable file (.exe and .msi files are supported) and click the “Open” button. A script recording window will appear in front of us:

At the bottom, in the “Program Description” section, you can enter short information about the program being installed, so that you can later remember what the utility is actually for. Pay attention to the “Options” window (third from the top).
Here you can set the type of future installation of the program: regular “silent” (silent, /s) installation, “silent” with progress display (and without), or completely hidden mode. You don’t have to select any additional parameters and then you will always have access to manual control of the installation.
When all the settings are made, click the “Record” button and proceed to the “demonstrative” installation of the selected program :).
You will know that the script recording process has been activated by the tooltip in the tray, as well as by the information window that appears in the upper left corner.

In this window you can see the current coordinates of the mouse cursor, the object the cursor is pointing at, the current operation, etc. Important: try not to move the installer window unnecessarily, as this may affect the correct operation of the script!
Now a few words about the methodology for creating an auto-installation script. To record a command, you must press left CTRL or SHIFT.
It happens something like this: we move the mouse cursor to the desired button or menu item and press one of the above-mentioned keys.
At the same time, SHIFT remembers only mouse clicks, and CRTL can record keystrokes, dots, checkmarks, passwords, paths and the same mouse clicks, so in most cases we press CRTL without thinking. As soon as the button is pressed, your action will be remembered, and you will not need to press mouse keys.
If you need to change the path or enter the serial number of the program, for example, then you need to proceed as follows. We enter the required data in the text line, hover the mouse over this line, press SHIFT, and then CTRL.
When the installation is complete, you will need to stop recording the script. To do this, right-click on the Easy Autoinstaller icon in the tray and select the appropriate item.

Optimizing and saving the script
Now let's check our script for empty entries to optimize it:

If there are none, we can click the “Save script” button. If you need to delete any script item, just double-click on it and confirm the deletion.
Now you can check whether the auto-installation script is working correctly. To do this, remove the installed program, mark it with a checkmark in the list of Easy Autoinstaller scripts and press the “Start” button.

After this, the installation process should start automatically, and above the program icon in the tray you will see a report on the current installation step:

If the installation was successful, then we did everything right. Otherwise, you will have to either edit the finished script (the “Edit Script” button), or even rewrite it again.
When all the scripts have been checked, you can (and even need to) save the resulting project. To do this, click the button of the same name in the main program window.
Creating an installation disk
And now comes the most culminating moment - creating your own disk with software! :) To do this, click the “Tools” menu in the main Easy Autoinstaller window and select the only item “Disk Creation Wizard”:

If you followed all the tips described above, then all you have to do is specify the path to the folder in which all the script, distribution and project files are located, and then click the “Create” button.
Several files will be created in the specified folder, which will be responsible for loading the menu of our installation disk:

The main one of these files is AutoInstall.exe. By running it, you can see what the menu of our disk will look like:

In fact, everything here is simple and tasteful :). The installation disk window presents a list of programs that can be selected for installation and a “Start” button, which initiates the installation.
Did you admire it? :) Now all you have to do is burn the entire contents of the folder directly to a CD, DVD or even a flash drive, and the set of necessary programs with automatic installation will always be at your fingertips!
conclusions
Easy Autoinstaller FREE, of course, is slightly inferior in ease of use and functionality to commercial products, but it copes with its main task, if not a “5”, then certainly a solid “four”.
In any case, I advise you to familiarize yourself with this program and, just in case, create a disk with the necessary drivers and software. Who knows, maybe one day this disc will really help you out;).
P.S. Permission is granted to freely copy and quote this article, provided that an open active link to the source is indicated and the authorship of Ruslan Tertyshny is preserved.
Currently, the installation procedure for programs is as simplified as possible; the user only needs to select an installation mode, enter registration data and read the license agreement. But when you need to install dozens of programs, the time taken from the user increases significantly; he is forced to stay at the computer all this time just to answer the next question from the installation wizard and click the “Next” button. And if the user is a system administrator whose responsibilities include installing programs for employees of the organization, this, without a doubt, greatly distracts him from his main activity. Is it possible to somehow automate this process? Can! Using the MultiSet program from Almeza.
Once you show MultiSet how to install the software, you will be spared this procedure in the future. All user actions are recorded in a batch file (MST), and future program installations will repeat the events of this file. MultiSet itself will launch the installation wizard, select the necessary modes, enter registration data, and click the “Next” and “Finish” buttons. All necessary programs will be installed one after another, freeing the person from the need to constantly be present at the computer.
Program interface
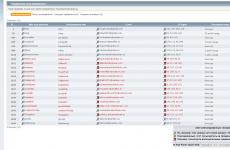
The program window is divided into three areas. The first is a tree of categories into which programs will be grouped. The second is a table with a list of packages of the current category. The third is a log table with the results of installing programs from packages.
When adding a new package, the user is prompted to enter its name, description and select a program installation file. After which a window for recording user actions will appear, and the selected distribution file will begin to be executed. All operations performed by the user - pressing buttons, entering serial numbers, selecting installation modes - will be recorded in the package. 
The recording applies to absolutely all events, even those not related to the program being installed. Therefore, if you need to switch to another task during the application installation process, you need to press the pause button in the recording window. The recording will be stopped, and the installation of the program will continue until the first dialog requiring user intervention. The recording window provides one interesting feature - entering text information in the installation dialogs through its own text field. Let's give an example. During installation, the program asks you to enter your last name, initials, and organization name. If you enter all this data without pausing recording, then the next time you install a program from the created package, the same information will be entered, even if you are installing the program for a completely different user. To avoid this, when entering data, you need to click the "Pause" button, enter the required data in the text field that appears and click the Paste button. The following figure shows an example of entering registration data through the text field of the record window. After clicking the Paste button, the word "Pupkin" will be inserted into the Last (Family) Name field. 
All text information entered in this way will be available for editing in the created package, and during the next installation you will simply need to replace it in advance.
Next time, to install one or more programs, all you need to do is check the boxes in the packages table and run the installation - all programs from the marked packages will be installed.
Now let's look at the properties of the created package. The first "General" tab of the properties window specifies the package name and installation executable file. 
The "System" tab contains such uninteresting information as the operating system in which the package was created, theme and screen resolution.
And the “Inserts” tab stores text data entered through the text field of the recording window. Here they can be edited for the next installation. 
The fourth tab, “Scenario,” contains a list of all actions performed by the user. The list is marked - for each event there is a check mark. A checked box means that the action will be performed automatically. If the checkbox is unchecked, the action will not be performed. In this case, the installation program will simply skip it or wait for the user's reaction (for example, to click the "Next" button). 
Creation of a universal database
When packages have been created to install all the necessary programs, you can use them to create a universal distribution database on separate media. The first step is that the universal database creation wizard will ask you to select the directory in which it will be located. Next, you should select the installation program packages that will be included in this database. It often happens that a program distribution consists of a whole set of files. In this case, you can configure not only the installation file to be copied to the database, but also the entire directory in which it is located. And the last step of the wizard is to simply click the "Start" button. All necessary files will be copied to the directory of the created database. 
In addition to software distributions, you can add a Windows XP distribution to the database. In the processing intended for this, the directory with the Windows XP distribution kit, the universal database directory and registration data are indicated: user name, organization name, computer name (by default these are already filled in) and registration number. All that remains is to click the Create button. 
When the program database is ready, it can be written to a separate medium: CD, DVD or flash drive. The next time this media is inserted into the computer's reading device, the database will automatically offer to install all the software packages included in it, and will not require your participation during installation.
Summary
The advantage of this software solution cannot be overestimated. MultiSet automates such a seemingly automatic process as installing programs. Now the need to reinstall the system will not frighten the user; absolutely all installation work can be transferred to the computer itself.