How to connect your Philips TV to the Internet via WiFi
To connect a Philips Smart TV to the Internet using a cable or via WiFi, you will need a router that is configured and connected. Next, you need to turn on the TV on the control panel and press the “Home” button with an icon in the form of a house:
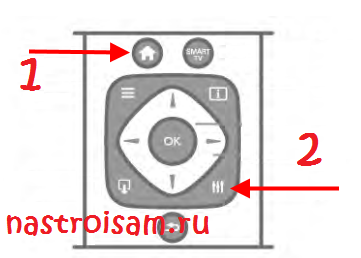
And then the “Settings” button. This will take you to the settings menu of your Philips TV.
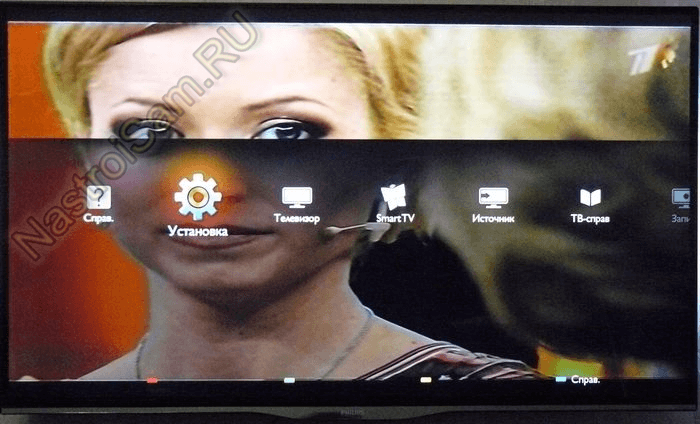
In the menu that opens, select “Install”:
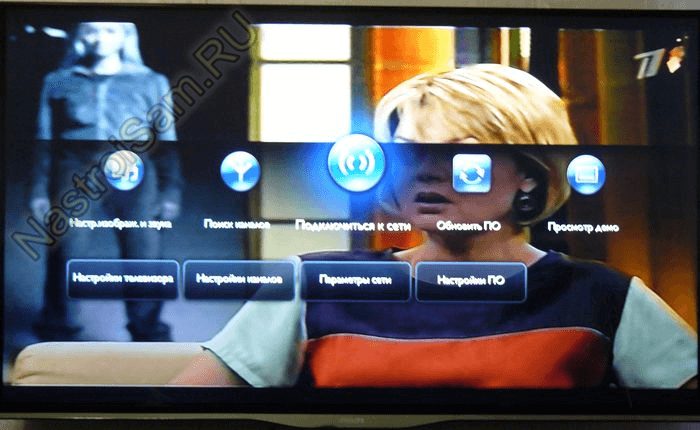
Then you need to select “Connect to the network”:
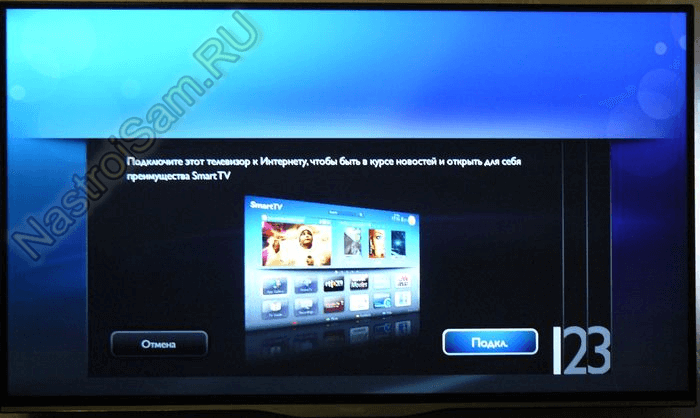
We agree with the proposal and click the “Connect” button:
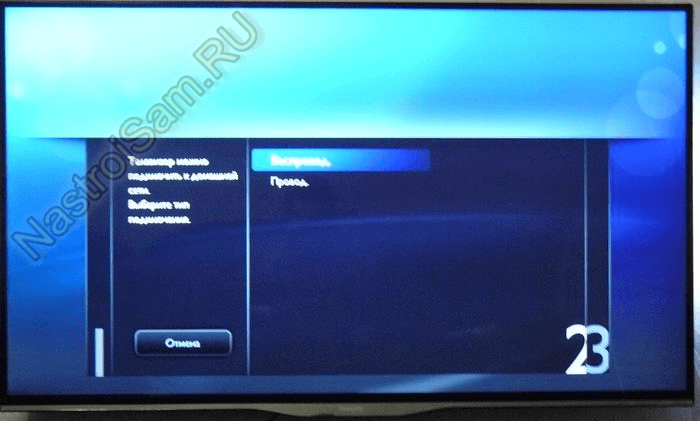
Select the type of connection - via a network cable - “Wire” or wireless network. — “Wireless.” If you choose a cable connection, then everything is simple - the TV will receive an address and the connection process will end. To connect via WiFi, select “Wireless.”:
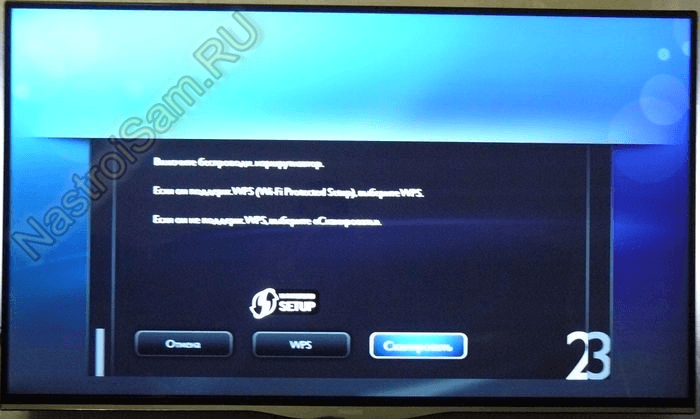
Here Smart TV TV offers two options - via WPS and regular. It is easier to connect via WPS, but your router must support this function and it must be activated. In this case, all you have to do is press the WPS button on the router, and then in this window:
After this, the TV will connect to Wi-Fi and access the Internet.
For a normal connection, click the “Scan” button. The wireless adapter will scan the airwaves and display a list of networks available for connection:
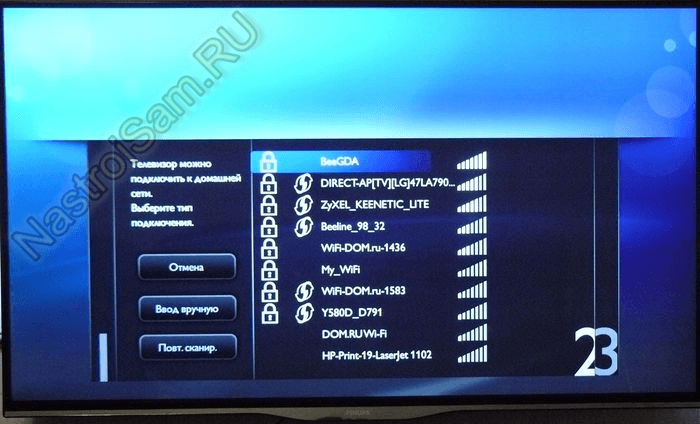
In this list you need to select yours and press “OK” on the remote control. If you use encryption, then the next step will ask you to enter the key:
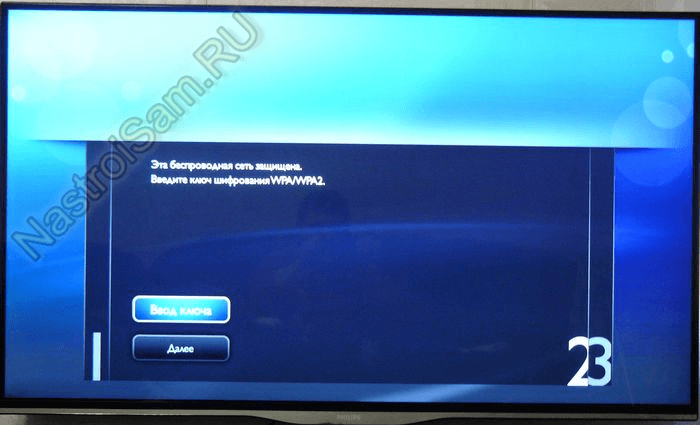
Click on the “Enter Key” button and get an input line where you need to enter the WiFi password:
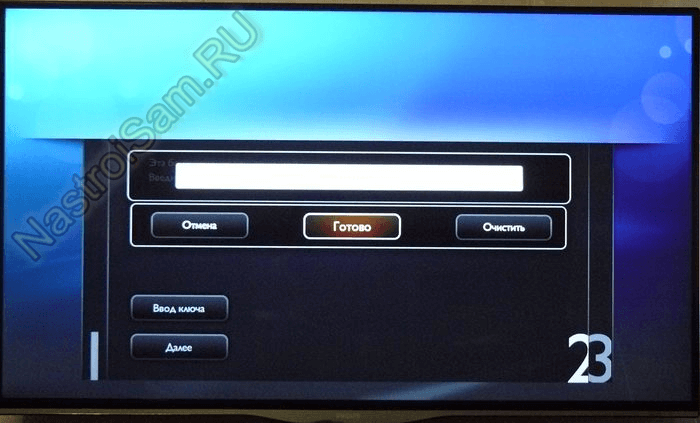
After this, you need to click on “Done”, and then on “Next”. If the key is entered correctly, you will see this message:
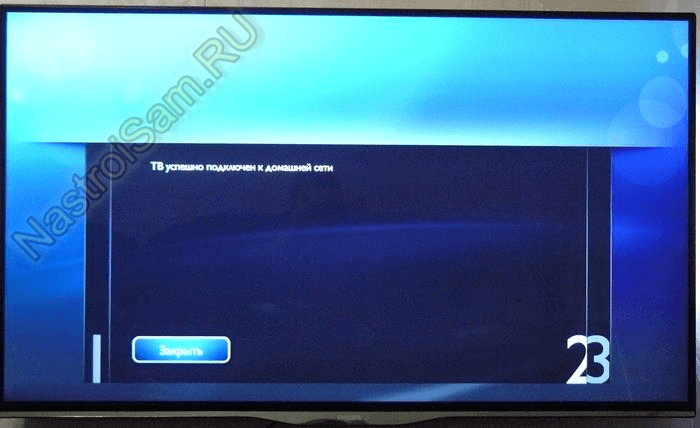
We close it and... we get another message that your Philips TV is connected to your home Wi-Fi and can access the Internet:
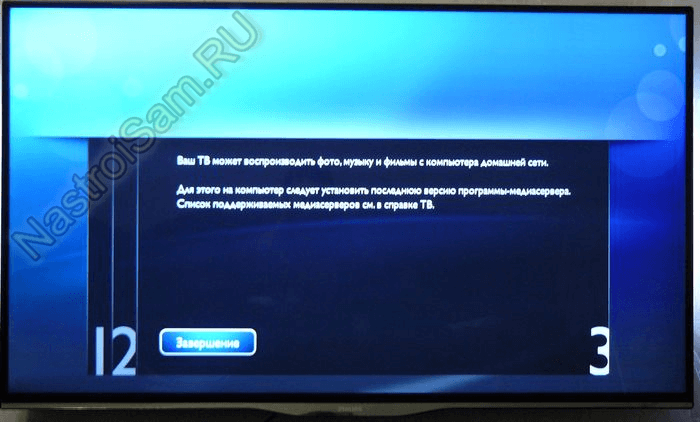
This completes the connection setup. You can safely launch your browser and surf the World Wide Web.


