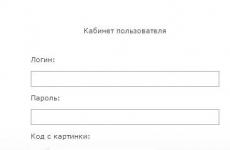
How to change firmware on Android 4.2. How to update Android - flash your smartphone to the latest version. Rollback to previous version
This article will tell you, including all the examples and details, how to install Android on your tablet, smartphone, or other devices.
There will also be a lot of advice on this matter.
Step #1. Installing and obtaining ROOT rights
- Click on this button and the program downloads;
- Click on the downloaded file and open the Kingo Android ROOT program. (Click "YES" if the system asks for permission to start.);

- Inside the program we can see that the device is not yet connected. We connect our phone via USB;

- We will also need to enable debug mode (in the program itself there will be pictures with instructions on how to do this). If the instructions are not enough for you, then you need to find the “Developer Menu” and enable the “USB Debugging” option;

1.6. After our program has seen the device, the “ROOT” button will appear;
1.7. Click on it. Ready! You have received ROOT rights to your device.

Step #2. Updating Recovery on your device
The next step will be to update Recovery.
Recovery or special boot mode is a special mode on the device, thanks to which you can restore the system or download updates for it.
Installing Recovery
To install Recovery we will use the application - ROM Manager, this program is specially made for easy access to the Recovery system.
- First, we must go from our gadget to the ROM Manager website;
- Click on the download button and download this application;

- Next, go to downloads and click “Install application”;
- Go to ROM Manager. And we immediately see the “CloclworkMod” button in the main menu.

Click on it and the application is updated to the latest version;
- The top line will contain the model name of your gadget. Click on it;

- Next, Recovery will be installed and downloaded to your device (This action requires an Internet connection);

- Recovery has been updated and you can move on to the next step with peace of mind.
Advice! Use ROM Manager carefully and follow the instructions, do not press unnecessary buttons, otherwise you can turn your phone into a brick.
Step #3. Data backup
Backup is the saving of your data on the device, it can be partial or complete. In our case, complete.
Starting a backup
For this we will also use the same ROM Manager.
- Go to ROM Manager;

- Then select the line to save the current ROM. We save the file so that we can find it at any time (we write all the names, save the file under a name convenient for us, and also set the current save date);

- After this, the phone/tablet will perform a standard reboot. All actions will take place as usual;
- Also, the backup copy will be saved on your device in a specific folder that you specify;
- The backup is complete.
Advice! Do not under any circumstances delete the backup you have saved. If you downloaded Android and something went wrong, you won't be able to do anything back!
Step #4. Download and Install Android
So we moved on to the Android download itself, all the actions that we carried out earlier were only preparations for installation.
- We find the program itself on the computer - Android. And we download this archive for ourselves;
- We connect our device on which we want to install Android to the computer (via a USB drive);
- Next, we copy the archive to our device, to the internal storage of the phone (Important! The archive does not need to be unpacked);
- Next, go to ROM Manager and go to the tab with the name of our device. Click on it, we see the “reboot” button, click on it. After this, the recovery is rebooted;

- We find in the application a return to factory settings. We carry out this action. Confirm execution;
- We do the same when we configure WipeDalvikCache;

- On the screen of your device there will be an item Choose ZIPfromSdcard, click on it;

- We type any name for our file, firmware, then click save;
- Click the “Yes - Install” button and carry out the operation;

- We are waiting for the started process to finish, this may take a couple of minutes;
- Select the “reebot” button, after which the device will restart. The reboot may also take a couple of minutes of your time;

- Ready! Now you have Android installed on your phone! Congratulations.
- If you have previously flashed firmware on your phone, then you should not update the recovery;
- In case of an error, simply roll back the phone;
- Perform all actions with the phone fully charged! What will you do if your phone runs out of charge during this process?;
- Also select the most current firmware for your device.
The Android operating system today is very popular among owners of various gadgets - phones, tablets and others. That is why manufacturers are trying to monitor the process of updating the Android version and implement their support in their models, at least flagships. Therefore, you need to know how to update Android on your phone yourself.
Developers of any system strive to improve their product. Android is no exception to this. Updating the system improves the performance of the gadget and eliminates errors and shortcomings of previous versions. All this leads to improved performance of the smartphone in general. Android updates are often noticeable even visually when the interface changes and some new configurations appear.
There are micro and macro updates. Small ones often weigh no more than 70-100 MB, but macro ones can weigh on average 500 MB. To update the Android version, it is advisable to have a Wi-Fi connection or unlimited Internet. Although the latter can significantly delay the entire process.
If the auto-update feature is enabled in the phone settings, the user will simply be notified at the end that the operating system has been updated. Self-installation is relevant in the following cases:
- there is no auto-update, information about a new version has appeared;
- The current version does not support existing or new applications on the phone;
- There was a need to roll back the system.
For example, my LG L90 smartphone has Android 4.4 as its native version. But after the first turn on, it was updated immediately to the latest version, or rather to 5.0.2.
We will consider those cases when you need to update the software manually.
Update methods
Via phone
How to update the Android version with only a phone?
This method, in my opinion, is the simplest. To update using it, you need:
- In the phone settings, select the “General” tab;
- tap “About phone”;
- select “General” again (I have duos, so it may differ);
- you can view all information about the software version or immediately go to the “Update Center”;
- here you can update applications that require it, or immediately the system;
- by selecting the second item, we will see that you can check Android for updates, as well as enable/disable the ability to auto-update;
- after selecting the check item, the phone warns that to carry out this operation the device must have access to any network except 2G (I had everything turned off);
- After connecting to the network, it searches for updates, after which either a message appears about the relevance of the version, or the update begins.
The main condition for this method is a high level of battery charge so that the update process does not end in a force majeure event. You can even update Android 2.3 to 4.0 in this way.
Manual flashing
Micro and macro Android updates appear almost every day. Manufacturers do not always have time, and perhaps do not strive, to develop them for all models. Sometimes this takes a very long time, and the update may not arrive at all. How to make sure you don't miss out on improvements for your phone?
In such a situation, you can independently change the firmware of your smartphone via Recovery. To do this you need:
- From the official website of the manufacturer of your device, download a zip archive with the firmware we need (check the version number and build date before doing this) and place it on the phone’s memory card.
- Turn off your smartphone and go to Recovery. The login combination may be different for all phones. For example, on LG L90 it is “Power + Vol (up or down)”, on Motorola and Lenovo phones it is “Power + Vol up + Vol down”.
- Select the “Apply update” item.
- Now the item “Choose from sdcard” (“Choose from internal storage” if the archive was saved in internal memory).
- Go to the desired folder, find the installed firmware file and run it.
- After the installation process has been completed, you need to return to the main menu and from there reboot the device “Reboot system now”
Using a computer
How to update the operating system if there is no access to Recovery?
In this case, you need to have a cord to connect your smartphone to your PC, as well as a disk with drivers for the official service program for a certain brand of phone. The latter may be missing, but this program can be downloaded.
Let's look at this method using LG phones as an example. For them you can download the KDZ Updater application. The necessary conditions are:
- download the Android system update (archive KDZ_Update.zip);
- mobile phone charging level is 50% or higher;
- LG drivers installed;
- availability of a firmware file for a specific model in KDZ format;
- absence of any other program for LG (not counting the driver).
The procedure for updating software for Android through this program is as follows:
- Unzip KDZ_Update.zip and transfer it to your computer’s system drive. Move the firmware file there too. Run the msxml.msi file from the archive.
- Through the phone settings, enable USB debugging on LG. In my case, the fifth Android did not immediately provide such an opportunity. This does not mean that it is not possible to enable it. First, you need to find the build number in the phone information and click on it 5 to 10 times in a row. The notification “You are now a developer” will pop up. Now the “Developer Options” item will appear in the general settings. There you will find the “USB Debugging” item.
- Then turn off the device and remove the battery (for some LG phone models this is necessary for flashing).
- Press and hold the “Vol down” button and connect your smartphone to the computer. The message S/W Upgrade should appear. If it is not there, you should repeat everything, but with the battery inserted. Next, the battery must be in the phone in any of the cases.
- Go to Device Manager on your computer. Disable LGE Mobile USB Modem.
- In KDZ Updater, in the type field, you need to select 3GQCT from the drop-down list, and in phonemode - DIAG.
- In the KDZ file field we enter the path to the firmware file or simply select it through the open files button.
- If everything was done correctly, the user will see that the system is updated.
You should use the same method and, if necessary, roll back the Android version to any of the previous ones. Do not forget that the software update will lead to the fact that all files, contacts and SMS stored in the internal memory of the phone may be lost.

When Google released the next version of its mobile operating system, there was no doubt that the serial number 4.4, instead of the supposed 5.0, indicates that no important changes should be expected. Indeed, on the Google website you could find only a little more than a dozen items, some of which have long been present in proprietary shells of third-party developers. Does everything really work so well in Android OS that there is nothing to add? But this operating system now runs 81% of smartphones in the world. If the changes are not significant, why not leave the code name the same? Because even this small number of changes made makes you look at Android as a new OS, from design to smoothness and speed of operation.
Most of the features described below are available on devices natively running the Android 4.4 operating system. Devices updated to Android 4.4 do not have a built-in Google Experience launcher
First, let's look at the visual differences in Android 4.4, and they start with the lock screen. Widgets that appeared in are now hidden. Those who use them will have to enable them in the Security section. A camera icon has been added to the lower right corner. By clicking on the camera shortcut on the right side of the screen, a preview of the application appears. To go to it, you need to move the icon to the left. There is also the previous option - shifting the clock widget to the left. Apparently, the innovation should help beginners by showing that their device can also launch the camera without unlocking the screen. If you pull up the arrow at the bottom of the screen, Google Now will launch.


Having unlocked the smartphone, the user is taken to the main desktop window. The top and bottom lines have become transparent. Visually this makes the screen larger. The status bar got rid of the blue icons. Now the main color for Android is white. Below the status bar there is a non-deletable Google search field. At the very bottom there are three control keys: “Back”, “Home” and “Running Application Manager”. Above them are four shortcuts separated by an icon for calling a list of installed applications. Labels have become larger. Even higher are two circles, where the larger one indicates which desktop window you are currently on. As before, creating folders is done by dragging one shortcut onto another. The background of the folders is white translucent.


Holding on a free space on the desktop takes the user to a menu for selecting wallpapers, widgets, and search settings. Here you can change the location of desktop windows. You will no longer be able to find widgets to the right of the list of installed applications; they are all located here. The bottom row of shortcuts consists of the dialer shortcut, the Hangouts app that replaced Messages, the Chrome browser, and the camera. Each of these applications has received a number of changes. The interface of the application responsible for working with calls looks different. The last incoming/outgoing call is displayed at the top, below it are three large favorites icons, below are the most frequently used contacts, and at the very bottom is an icon for calling the numeric keypad and, on the left and right, icons for going to call history and settings. One useful thing to note is the automatic search for matches to unfamiliar information numbers in Google. For example, you dial the number 0 800 xxx xxx, press call and at the same second the smartphone changes the number to the name of the company, institution, service. Moreover, if they have a logo, it will automatically be inserted into the contact image field. The same principle of operation applies to incoming calls.


The application now allows you to communicate not only between users of Google accounts, but also through text and multimedia messages. There is no separate application for messages. Hangouts in its current form cannot be called a successful replacement for Messages; in particular, the implementation of grouping messages from the same users raises questions. On the other hand, the possibilities for working with messages are wider than before. As for the text keyboard, one cannot fail to note the huge range of emoticons.


With the exception of HDR+ mode, the camera interface has not undergone any changes. The principle of HDR+ is to stitch together three images taken at different exposures into one - allowing for greater dynamic range compared to conventional shooting. “Normal” HDR mode has long been present on almost all Android smartphones, but there these are additional features implemented by the device manufacturer, but here the function is initially built into the system.


The list of installed applications also remains the same, the only change is a transparent background instead of a gloomy black color.


There are slight differences in the Settings menu. The first ones touched on the operation of the Wi-Fi module; an option appeared that allows you to enable or disable the search for networks by some applications even if Wi-Fi is turned off.


The “Public Alert” menu, which is useless in our latitudes, includes the activation and configuration of notifications in the event of natural disasters.


The new "General" section is designed to help users select and remove installed launchers, if any.

“Tap & Pay” is the name of the menu where applications used for contactless payment using NFC will be displayed. For example, one such application could be Google Wallet.


There are also changes in setting up the operation of geolocation services - a more intelligible description of the modes for determining coordinates using GPS or Wi-Fi and mobile networks. High precision uses all available capabilities. Reducing energy consumption uses only mobile and Wi-Fi networks. Identification by device sensors includes GPS operation. Once you decide which mode is best for you, you can find out which of your installed apps or services requested your location, as well as how much of an impact it had on your battery.


The last of the new items is “Print”. By going into it you can find the network printer closest to you.
Among the less significant changes, we note the ability to run applications in full-screen mode, when the bottom line with the keys is hidden - this will allow you to use the entire usable screen area. In fact, many devices have already learned this feature, but only with Android 4.4 will it be supported at the hardware level, without the need to obtain Root rights.

The principle of multitasking has been redesigned: applications hanging in the background take up fewer resources, and the transition between them has become faster. Hardware support for IR transmitters has appeared, which can now be found in devices from at least four manufacturers: Samsung, LG, HTC, Sony. To improve autonomy when playing music, data processing will now be handled by the DSP processor. When playing music, an image of the current album and player control keys are displayed on the lock screen. Changes should also be noticeable for lovers of an active lifestyle - for this, Google has optimized the flow of data from all sensors available in the device.
Well, if you suddenly lose your smartphone or it is stolen from you, you can use remote control. To connect to a smartphone, it is enough that it has access to the Internet and, importantly, your account remains. The user can lock the smartphone, reset to factory settings, turn on the signal and find out the location of the device. The accuracy of determining the last parameter depends on which means of determining coordinates are used. Even if all of them are disabled, including the determination of coordinates by Google services, you can still get coordinates with an accuracy of 20 meters. This opportunity is both exciting and scary.


The download manager has changed somewhat, now it looks more like a file manager. The email client was updated, although it was not possible to understand what the differences are between the conditionally new and the current version of the client. Car enthusiasts should like the fact that messages can be read not only from the smartphone screen, but also from the car’s multimedia system (support for the Bluetooth Message Access Profile has been added), without being distracted from the controls. The last thing I would like to mention is Quickoffice - an application for working with office documents, both from the internal memory of the device and cloud services.


Opting out of using the Dalvik virtual machine
Let's start describing the remaining innovations with the most dramatic one - changing the application runtime environment (compiler) from a virtual machine Dalvik on ART(Android RunTime). Without going into the weeds of programming, the main difference between the ART compiler is that applications are optimized for a specific device during the application installation process, and not at the time of its launch, as is the case now. When switching to ART, there are both advantages and small, but disadvantages. The latter includes a slightly larger size of the applications themselves and, as a result, a slightly longer installation time. The benefits: reduced power consumption due to less load on the processor, more free RAM, faster launch of applications and improved smoothness. Since we used a smartphone to write this review of Android 4.4, we can’t say how smoother the device’s operation becomes when switching to ART. If you trust the reviews of users of other Nexus devices that received the Android update to version 4.4, then, according to them, the smoothness and speed of launching applications has noticeably increased. On our own behalf, we would like to add that the use of ART significantly affects the autonomy of the device, which is clearly seen in the LG Nexus 5, where we compared the operating time of the smartphone when using the Dalvik virtual machine and ART. The question remains open of how quickly “regular” devices that will use Android 4.4 will receive such significant changes and, in fact, whether they will receive them at all. Another important change in Android 4.4 is the ability to work on devices with 512 MB of RAM. So owners of not entirely new smartphones, for which there are custom firmware from Cyanogen and AOSP, may well give their device a second wind.


Ok Google
To access Google Now, you need to go to the far left of the desktop window or swipe up from the bottom edge of the screen, even if the screen is locked. Since Google is trying to update its services on all devices, and not just the Nexus line, you can learn about the new features of Google Now on any Android smartphone you have at hand. As for voice search, there are no changes yet for people using a non-English interface language.


Results
![]()
Android 4.4 KitKat is not just another operating system update; it shows where the developer is heading. The focus is on improving autonomy and smoothness, interacting with other devices through wireless communications, giving the shell a lighter look and adding features that have long been present on most Android smartphones. If with the advent of Android 4.3 Jelly Bean, users received practically no significant changes, then an update to Android 4.4 KitKat is worth waiting for, at least for the sake of improved smoothness and battery life. In addition, as already mentioned, it will be possible to install and comfortably use the new version of the OS not only on smartphones with 1 GB of RAM and higher, but also on smartphones with 512 MB of RAM. This means that next year the segment of low-cost devices will become even larger, which will entail a reduction in the lower price level and will increase the already huge share of Android smartphones.
To begin with, I would like to apologize to our readers for such a long delay in the publication of this article. Let me remind you that for the most impatient we already had small material from a Google presentation, this same article is intended for those who are planning to buy a smartphone or tablet with 4.2 on board and want to know what benefits they will get from the new version of Android. We will also refer to this article in the future when we talk about 4.2. Now, without further ado, let me move on to the review itself.
Keyboard
To tell the truth, I personally am already so accustomed to installing a third-party keyboard when testing or buying a new smartphone that recently I have not even paid attention to innovations in the stock one. I still remember the irritation that you experience when setting up your tablet for 4.0 for the first time, when in order to enter English characters you need to go to settings and activate other languages. Fortunately, in 4.1 this problem was fixed and finally added a separate button for switching languages. But Google decided not to stop at these improvements, and in 4.2 the keyboard received another new feature: entering text using swipes. To do this, you need to activate this function in the settings.
I liked the new input method, although its accuracy is sometimes inferior to the original Swype, however, we hope that over time it will increase.
Notification line
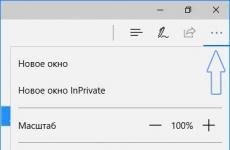
Google (apparently due to popular demand or with an eye on TouchWiz and CyanogenMod) has finally decided to add functionality to the notification shade.
Swiping to the right now opens the switch panel. When you click on most of them, you are taken to the settings (we are talking about Wi-Fi, Bluetooth, GPS, charge indicator), in some cases, clicking immediately activates the action (for example, enabling/disabling screen auto-rotation). On the right is your Google+ profile photo; clicking on it will open your address book.
 |
 |
 |
 |
A swipe to the left opens the usual notification panel. Now it adjusts to the number of notifications, rather than reclining to the full height of the screen.
Interestingly, a different combination is used on smartphones: for example, a two-finger swipe brings up a panel with switches, and a simple swipe brings up the notification panel.
What's New in Gmail
You can now quickly zoom in on a letter using a two-finger pinch. This function is enabled in the settings. Double tap after scaling adjusts the text to fit the screen size.
 |
 |
 |
 |
Widgets on the lock screen
Starting from version 4.2, you can install one of several widgets on your lock screen. By default, mail, calendar, clock, and Google+ widgets are available. Third-party developers can also add support for lock screen widgets. At the moment, the developers of HD Widgets and Plume have already taken advantage of this opportunity. If you have a Nexus device, be sure to try HD Widgets, I think their lock screen widgets are really cool.
 |
 |
 |
 |
 |
 |
Watch
Google decided to improve this application and add additional functionality to it. When you open it, you see a large clock with the current date. There are three shortcuts at the bottom, one of them takes you to the alarm clock, the second allows you to set the time zone, and the third is responsible for switching to night mode and settings.
 |
 |
By the way, you can control the timer and stopwatch after launch directly from the lock screen.

The application also has its own digital widget. Now you finally don’t have to think about which third-party widget to install on your home screen.

Sleep mode
You can now configure how your device behaves when entering sleep mode. For example, so that you don't get bored just watching your tablet being turned off and charging, Google decided to add several screensavers that turn on in sleep mode. First, you need to select the time when they will turn on. Then you need to decide on the screensaver itself; there are five templates in total: clock, collage, media, frame and colors.
Collage displays your photos as scattered miniatures. You can choose the folders with displayed photos yourself. You can also select photos from your web storage in Picasa. If any of the photos interests you, just click on it to open it in full screen mode.
In the “Media” mode, you can see the latest news from the application of the same name on the screen. Clicking on a news item opens a short announcement of it, and you can immediately go to the application itself.
The idea is that when you add a new user, they have their own desktops, games, and applications. All its settings are personalized. At the same time, information such as Wi-Fi passwords is available to all users immediately. Using multiple accounts will be in demand, first of all, in families, and will eliminate problems like: “Dad, why did you delete my game?” However, it is important to remember that, despite the presence of two accounts, the amount of internal memory is still the same. By the way, about the internal memory: if you log in from one account and connect the tablet to the computer, then you will only see files uploaded for this account, for example, screenshots taken from another account will not be visible.

 |
 |
 |
 |