How to update Sony Xperia firmware. Sony Update Service is a program for solving problems on SONY phones. Update via computer
Sony is one of the world leaders in the quality, functionality and reliability of its products. Their devices always receive the latest firmware versions and are supported for quite a long time. The update process itself is standard and does not differ much from smartphones of other brands, but in some cases exceptions are possible. How to update Android on Sony Xperia, what are the pitfalls of this process?
Why is it worth updating your OS?
In most cases, the update is not difficult. If the device is new, the update will arrive via Wi-Fi as soon as it becomes available.
You need to update your smartphone for several reasons. First of all, in order to update the system. New OS version - new features, capabilities, bug fixes and optimization.
If these are official updates from the manufacturer, and not some custom solutions, you need to install them immediately, without hesitation. This way you get a lot of new features, ranging from minor fixes to the transition to new versions of Android.
How to update Sony Xperia
Updating Android on Sony isn't much different from the process on hundreds of other makes and models of Android smartphones. You also have three ways of developing events:
- by air;
- using a proprietary program (for Sony this is Xperia™ Companion);
- using custom firmware.
The last method is a rather complicated solution for Xperia. All Sony phones have a locked bootloader, which adds an extra step to the flashing instructions. Unblocking is also not an easy process.
By air
To update this way:
- Go to settings.
- Select "About phone" at the very bottom of the list.
- Click on "Software Update".
- Select Check for Updates.
If the download process starts, wait for it to complete and click on the “Install” button. If there is nothing new for the smartphone, you will see a message about it. For now, you can still update your Sony Z5 to Android 7, but you shouldn’t wait for new products for older models.
Via Sony PC Companion
Before starting the process, make sure that the USB cable is intact and securely held in the connector. Once you download PC Companion, open it and follow these steps:
- Connect your phone to your computer.
- Unlock the screen on your smartphone.
- Select the connection mode: “Data transfer”.
If updates are available, a pop-up window will appear letting you know. In this case, you will need to perform all the actions that the program itself will tell you. You can try updating older device models. For example, you can try to update your Sony Xperia Z3 to Android 7.0.
 Need for this action may be needed only after an unsuccessful flashing or a failure that critically damaged the system. To restore the device, follow the steps:
- Launch PC Companion.
- Go to the Support Zone section.
- There, select "Software Updates" and then "Recovery".
- Agree to the deletion of all user data.
- Select your phone model from the list.
- Follow further instructions programs.
It is important that your smartphone has as much charge as possible. If it is not possible to check the charge level, charge your smartphone for several hours.
Installing custom firmware
As we already mentioned, the process of installing custom firmware on Sony devices requires a relatively complex bootloader unlocking process. Apart from this point, the custom installation instructions are similar to those for other smartphones.
If you choose to flash the firmware using a PC, it is best to use the Flashtool program.
Rating: 
From time to time, the company's developers create new firmware versions to update Sony Xperia smartphones. New versions bring some changes in software, allowing you to achieve better performance and the general functioning of the device. I have repeatedly received questions about how to install the update on Sony Xperia different models, how to update the device when a new firmware version has arrived or restore the smartphone if some kind of malfunction occurs in its operation.
Over-the-air installation
The simplest method that does not require detailed explanation. When your smartphone is connected to the Internet (preferably stable Wi-Fi), it will independently conduct a quick analysis for updates, or you can do this by going to Settings - About phone - Software update or by logging into the Update Center application. There you will see if there is a software update and if there is, then just click on the arrow, after which it will download and automatic update. Everything is simple and without unnecessary hassle. The smartphone battery must be charged at least 50% at the time of installation.

Update usingPCCompanion
I usually update my Sony Xperia Z2 using the branded one and recommend it to you this method. I should immediately note that the battery needs to be charged to at least 50% in order for the application to allow the update.
And so, just connect your Sony Xperia to personal computer, on which the specified application is installed, after which it will automatically check for an update and if there is one, it will notify you. Even if you accidentally close the information window, don’t worry, because at the top there will be large print the message “Phone/tablet software update available” is indicated by clicking on which you will proceed to install it, or go to the “Support Zone” menu item - in “Phone/tablet software update” click “Start”.


After this, the whole process is intuitive and simple - just read what is written, what stage is going on, and click buttons like “Next”, “Accept”, “Yes” and the like, agreeing to the conditions. There should be no problems here; below are screenshots of the process.


After this, a window like the one below will appear and the smartphone will turn off, then the update will begin.

At the end of the process, you will be asked to disconnect the phone from USB cable and turn it on, and by clicking on the “Next” button you will be notified that the update operation is complete.


Software recovery inSonyXperia
Previously, the SUS (Sony Update Service) application was used for recovery, but after its support was discontinued, this is now done using the same PC Companion. There are different situations when you need to restore the system to its original working state. For example, something began to work poorly, it went wrong, and so on. There are many situations where it is possible to return to normal operating condition only through restoration. Please note that this will erase all data from the memory of your smartphone or tablet!
And so, to restore the Sony Xperia, connect it to the PC, launch “Companion” and go to “Support Zone” - in “Phone/tablet software update”, click “Start”. You will be notified that the device has the latest firmware, however, if problems are observed, you can restore it.

More experienced users can also use FlashTool to install firmware from a ready-made FTF file –
Xperia Z1 before latest version firmware from new android version possible in several ways. This material explains everything in detail possible ways updates.
The simplest and most accessible method for any user is the possibility of an “over the air” update (OTA). Updates of this type are provided by manufacturers in automatic mode. In order to install them, just a couple of touches are enough. Moreover, in this case, all personal data and OS settings are not deleted, but remain.
Another way to update Sony Xperia Z1 is to install official firmware in manual mode. Here you have to wipe the data, so it is recommended to first save the latter as a backup copy. This method is relevant in situations where the network already has official firmware for your smartphone model, but the OTA update does not yet work. In addition, you can use it if you need to restore the official firmware and return the warranty on the gadget.
Another popular method for updating Sony Xperia Z1 is installing custom firmware. In this case, you can radically change the interface and functionality of the device, with better optimization and increased performance, as well as get a number of other useful advantages. When installing custom firmware, it is strongly recommended to backup all memory, and in addition, it is necessary to install and.
To use the second and third methods, you will need to do the following:
- disable anti-virus protection on your computer;
- activate on the gadget;
- charge the Sony Xperia Z1 battery;
- use an update file specially designed for this model;
- understand that all responsibility for manipulating the smartphone lies solely with the owner.
Steps to update Sony Xperia Z1 firmware via OTA:
1. Connect to WiFi networks with your Sony Xperia Z1.
2. Find in the settings and open the item that contains information about the device.
3. Select the option with firmware data.
4. If it shows that updates are available, you need to download and install them.
Manual method to update Sony Xperia Z1:
1. On the official Sony website, find the update file for your Sony Xperia Z1 model and download it.
2. Download and install on your computer.
3. Copy the .ftf file (update file) to the XPERIA Flashtool-related Firmware folder.
4. Launch the Flashtool application, through the interface of which you need to find the update file suitable for the Xperia Z1.
5. Turn off your smartphone.
6. After receiving a notification from Flashtool that you should connect the gadget, you need to quickly connect it via the USB connector to Sony computer Xperia Z1, in this case it is necessary that the volume down button is pressed.
7. Wait while the update process occurs.
Updating Sony Xperia Z1 using custom firmware
1. Here, as before, it is necessary to mandatory previously and .
2. Find and download custom firmware, which is designed specifically for Sony model Xperia Z1.
3. In addition, you need to find and download Google services, which may not be included in the new firmware.
4. Move or copy both archives to your smartphone without unpacking.
5. Disconnect the gadget, then boot it into recovery mode.
6. Perform a wipe using commands wipe data factory reset, wipe dalvick cache and wipe cache partition.
7. Install the update file using the functions install zip from SD card and then choose zip from SD card.
8. Similar to point 7, use the same commands to install Google services.
9. Reboot the gadget from the main menu using the command: reboot system now.
This summer I decided to buy myself a new one mobile phone. My old cell phone was from a company Sony Ericsson(W810i Walkman) and I was completely satisfied with the quality of work and functionality. It served me for more than 5 years and, as I always say, it will even survive a nuclear war. That's why I decided to buy a new device from Sony Ericsson. I chose a Sony phone Ericsson Xperia Ray. This phone suited me in every way. He has stylish design, it is small in size (most modern phones are so large that I can’t figure out how to put them in my pocket), has a lot of bells and whistles (GPS, Wi-Fi, 3G and much more). And most importantly, Xperia is based on the Android platform, which has its roots in the UNIX family. The phone came with Android 2.0.4 by default. Naturally, I thought about how I could properly update Android on the Sony Ericsson Xperia in order to get the latest software in my device. As it turned out, the company thought of everything for me and there were no special difficulties.
Official Android update for Sony Ericsson Xperia
1. First you need to install the necessary software and drivers to connect your phone to your computer. To do this, connect the phone and PC using the USB cable that comes with the kit. After this, a notification will appear on your phone prompting you to install PC Companion. We agree and a new device with files for installing PC Companion will appear in “My Computer”. If there is no notification, then in the phone settings, check the box next to “Install PC Companion”. For me this option is located in “Settings - Connection Settings” 2. Then install the program on your computer. 3. Launch PC Companion and it will check for the presence of an official android updates for Xperia. The program found that I can update Android to version 4.0.4. I agreed and installed the updates. During the update process, necessary prompts will appear to help you. That's it. Following these three simple steps, I updated the firmware on my Sony Ericsson Xperia Ray.Unofficial firmware Sony Ericsson Xperia
In addition to updating your Android to the official firmware, you can also hack your phone by installing a different firmware on it. As a rule, this is done in order to unlock the Boot zone (bootloader) and install a custom kernel to unlock root access on the phone. There are many advantages to unlocked root. The system can be significantly optimized: removal options open up system programs, editing the processor frequency (which will have a positive effect on battery life) and much more. But there are also disadvantages. After hacking an Android, you lose the warranty on your phone. Also, when unlocking the boot record, special unique keys are erased, by which the service center firstly determines that the phone has been hacked, and secondly, access to some good apps. One of these is TrackID. After hacking, TrackID does not work because... it is tied to these keys. Here he is, my handsome man! Meet Sony Ericsson Xperia Ray httpv://www.youtube.com/watch?v=KulyxtauGAoGood afternoon, dear readers and subscribers of the blog, today I will tell you my struggle with Sony Xperia equipment. Yesterday I decided to update my Xperia Z2 Tablet sgp521 to latest firmware, since he periodically reminded me of this. It seems like things are normal, latest firmware and a lot of time has passed since its release, in short, I made up my mind, below I will tell you the process of how to update Sony xperia, but after that I caught a glitch of constantly rebooting the tablet, your screensaver loads, the desktop appears and only you have to click something your Sony xperia goes into reboot and everything repeats again, below I will also tell you how I dealt with this.
Reasons for wanting to upgrade your Sony xperia
- Due to new firmware you want to solve some problems present in current version
- Do you want to expand functionality?
- Someone advised
- He offered to update, agreed without any hassle
Once again I am convinced that if there are no obvious reasons to update the device, then there is no need, it works, don’t touch it
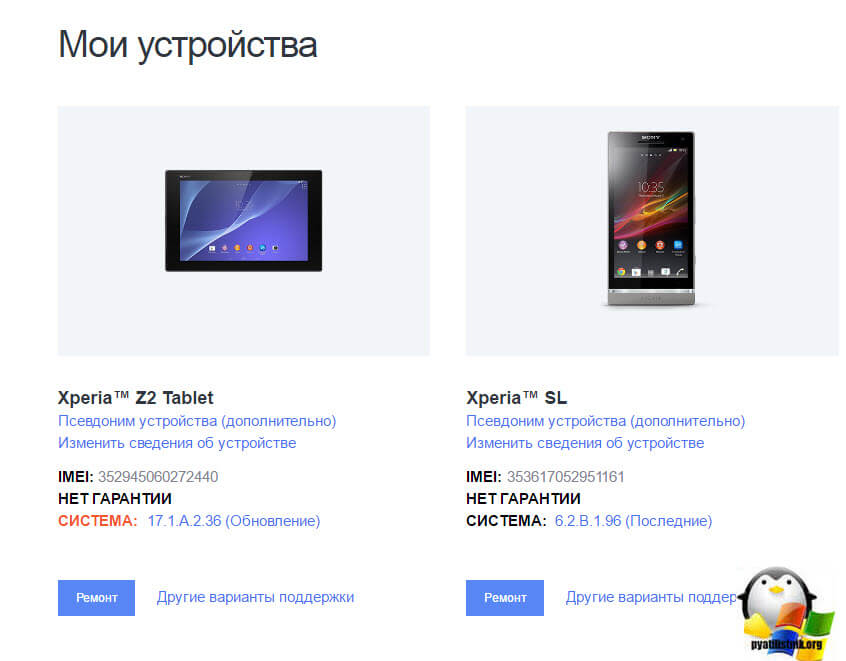
Registering devices on the Sony website
Before you start updating your Sony Xperia tablet or phone, I advise you to register these devices in your Sony account,
Registration there is quick, you can use your own account from Google+ or facebook. Once you get into personal account Click the Add button, this window will open, you will be required to specify either the device identifier or IMEI number.

And so, what is IMEI? If you decipher this abbreviation, you get International Mobile Equipment Identifier, and in Russian, international mobile equipment identifier, there is a certain GSM format, and in it it is just unique serial number each phone. Remember, like in the movies, they reveal the location of a person by phone, precisely thanks to IMEI, so tracking stolen phones is a completely feasible thing, but it’s a lot of hassle mobile operators they don't want to. To know IMEI android very simple, if we are talking about a mobile phone, then there are three options:
- You can find out the IMEI on your Android phone by entering *#06#

- You can view IMEI on the batteries, next to S/N, to the right of it

- And of course, in the menu, go to Settings > About phone > General information

On the tablet, IMEI can be viewed on the side

How to update android sony xperia
Let's now look at the question of how to update android sony xperia, there are three options, the first one you may have a notification about the availability of a new version of the software.

The second option is to go to settings > About device > System update, it can be installed from here, but not always.

There are times when you can update Android on Sony Xperia only using a computer and special software.

On Xperia tablet Z2 Tablet sgp521, I just had a requirement to use Xperia Campanion

To download Xperia Campanion, follow the link http://support.sonymobile.com/ru/xperiaz2tablet/software/ there are two distribution kits, one for MS systems, the second for Mac OS, this software can be freely installed on Windows 10.

let's tell you a little about what Xperia Campanion is, an application that allows you to safely and easily update your tablet or phone, remember the word safe and easily, allows you to do backup copy data and restore them if necessary.

How to install Xperia Campanion I think there is no point, all you need to do is press forward a couple of times.
How to update sony xperia via computer
In order to update Sony xperia via a computer, launch Xperia Campanion and connect your device to the computer via USB cable, I will be flashing Xperia Z2 Tablet sgp521. Xperia Campanion automatically detected it and offered to install updates. I would like to note that it is immediately suggested to install Android 6.0.1 firmware with build number 23.5.A.1.291. Click update. You will be reminded again about new version and will be prompted to click update.

Please note that after updating Android, rollback to previous version you won't succeed.

If a notification appears from Windows Firewall, then click Allow.

On the right top corner The progress bar for downloading firmware for Sony Xperia will begin.

As soon as the firmware is downloaded, you will be notified so that you do not under any circumstances disconnect your device during the update, otherwise you will receive a brick later.

The preparation of the Android update for Sony Xperia begins.


installation started.

You will have to wait a bit at the final stage.

All Android 6.0.1 with build number 23.5.A.1.291 is installed, disconnect the USB and turn on the device.
Please note that your device will take a little longer to turn on and the settings for services will be applied there. If everything works for you, then I congratulate you, if not, then read the section below

Cyclic reboot Sony Xperia Z2 Tablet sgp521
Unfortunately, Android 6.0.1 with build number 23.5.A.1.291 brought only glitches and frustrations, it updated to it normally, but the moment I turn on my Xperia Z2 Tablet sgp521, a splash screen passes and a window appears introducing new functions and where I I didn’t press on the screen, my tablet goes into reboot and so on in a cycle that we do first.
In Sony Xperia, a cyclic reboot is a consequence of a crooked installed firmware or corrupted firmware, first try to fix it in Xperia Campanion. But first, turn off your device, it usually didn’t work for me using the button, it turned on again, the combination helped out
Volume up key + power button. My Xperia Z2 Tablet sgp521 vibrated slightly and turned off
Open Xperia Campanion and find the Software Recovery item, which serves exactly this purpose.

If you connect a device that is turned on to your computer, you may receive an error
- Device needs to be unlocked
- Set your Xperia device to MTP mode

So, in order to restore the Android firmware on Sony Experia, turn off the device, especially if you have a cyclic reboot. Next, click here on the opposite side to restore your phone or tablet.

Now when you are sure that the device is turned off from the computer, press the volume down button and connect it again to the computer via USB, the recovery wizard will begin android firmware.

you must agree that your personal data will be deleted.

we see that the device is ready for restoration.

We wait two minutes.

We disconnect the device from the computer and try to turn it on.

Restore xperia firmware using XperiFirm and FlashTool
If the Xperia Campanion utility did not help you, like me, and your Sony Xperia has a cyclic reboot, then we try a combination of XperiFirm and FlashTool programs. XperiFirm is needed so that you can download the necessary firmware to your computer, and FlashTool will apply this firmware.
XperiFirm utility
You can download the XperiFirm utility from the link http://4pda.ru/forum/index.php?showtopic=592813 The current version is 5.0.0. To run it on Windows XP you will need a component NET Framework 4.0, and for Windows 7 NET Framework 4.6, in 8 and 10 everything is already installed. This program will help you download the latest official version I will write below about the firmware, how to download the older ones.
Open XperiFirm, find your device, select the firmware for your region and click Download.

To download more recent ones, official firmware, I give you a link to the famous portal http://4pda.ru/forum/index.php?showtopic=567703 in in this case the topic is dedicated to Sony Xperia Tablet Z2. According to your device, you can also find it there by searching.

Flashtool utility
Then you need to download the Flashtool program for flashing stock firmware on any devices (http://w3bsit3-dns.com/forum/index.php?showtopic=468628&st=0#entry22496817), as well as for installing various parts of the firmware, you can find it at the link above. I don’t see any point in telling you how to install Flashtool, just click on it a couple of times. Let's launch it.
Here we have two options for working with the program, the first is creating a firmware file in .ftf format, and applying the firmware to your device.
Create an .ftf file
In Sony xperia, cyclic rebooting is treated by flashing it, let's create it from the source files. We are waiting for the device database to load.

Click Tools > Bundles > Create

In the Select source folder field, indicate where you have the folder downloaded via XperiFirm

You should have files added to the folder list, now you need to click on the Device field in order to select your device that you will flash.

Choose your series, mine is SGP5XX (I have Xperia Z2 Tablet sgp521)


Now important point is to fill in two fields:
- Branding > assembly localization here
- Version > firmware version

All this data can be seen in the name SGP521_VMo RU-UA-KZ_1281-7867_23.5.A.1.291_R3D, where Branding will be RU-UA-KZ, and Version 281-7867_23.5.A.1.291_R3D

Select all the files in the folder list item and press the right arrow.

in the firmware content field you will see a list of folders from the firmware and click Create. The assembly of the .ftf file will begin which will help restore sony xperia.

The assembly process itself takes about a minute and a half.

We are waiting for the line Bundle create finished to appear and you will be shown the path to the firmware.

How to restore sony xperia
How to restore sony xperia and remove it constant reboot. We completed the first stage, prepared the .ftf firmware file, although you could easily download it if you found it on the Internet. You can find it along the path C:\Users\your username\.flashTool\firmwares.

We start flashing everything, click the lightning icon and select flashmode

In the source folder field, set the folder with your firmware, indicate which one you will upload. In the Wipe field, if you select: APPS_LOG, B2B, USERDATA, then when updating the Sony xperia firmware, you will delete all your personal data, click flash.
Make sure that before pressing flash your device must be disconnected from the computer

You will see the message Preparing files for flashing, preparation has begun.

We are waiting for the window in which they will tell you to press the button down and connect to USB.

The process of flashing your device will begin. If you get an error:
Drivers need to be installed for connected device
You can find them it the drivers folder of Flashtool
Then you don’t have flashmode drivers in your system, you can find them on your computer, along the path C:\Flashtool\drivers

Install drivers if you have operating system Windows 7, 8, 10, then right-click on Flashtool-drivers.exe and select properties.

go to the compatibility tab and check two boxes:
- Run the program in compatibility mode > Windows Vista
- Run this program as administrator

If you do not do this, during driver installation you will receive DPinst.exe error


Select Flashmode Drivers, Flashboot Drivers and drivers for your device.

As a result, a window with a driver installation wizard will pop up, click next there and agree to the installation.

ERROR - Found no matching config. Skipping boot delivery
ERROR - Error flashing. Aborted.
I don’t really understand why this is happening, but I’ll tell you how I got out of it.
ERROR - Found no matching config. I bypassed skipping boot delivery using this method, I only flashed Kernel, Partition, and System with deleting all user data, if this does not work out, then you can first reflash only the kernel, and then Kernel, Partition, and System.

Everything worked out for me in the end Sony firmware xperia.

We are all waiting for the final phrase Flashing finished.

We all turn on your device and check, everything worked for me, even the SIM card began to be seen.


