What is open server. How to install and configure a local Open Server. External access to local domains
Every owner of a website or blog, sooner or later, has an irresistible desire to somehow “finish” or “tweak” it. Having read cheerful articles in the style of “Hatemeel - it’s even simpler”, they, without hesitation for a long time, begin to straighten the delicate code with the help of a sledgehammer, a chisel and some kind of mother. The result, most often, is pulling out the hair on the butt and panicked letters to technical support: “Help, my site is dead!”
Those who are smarter and more careful understand that before you climb into a living organism with unwashed paws, you need to practice on some kind of simulator. Professional website developers have been using them for a long time and successfully. For quite a long time, the most popular was Denver, a full-featured simulator remote server on your own computer. But the project has not been resumed for about three years; the Internet has gone far ahead, modern computers and the old Denver system becomes crooked, or does not become at all.
The new favorite is the freely available OpenServer package. Type this word into Google and you will be taken to the project page, where you can download the source archive. Place it on a disk that has at least 1 gigabyte free space, and unzip. Go to the OpenServer folder and run the file with the same name.
First of all, you will be required to open Internet access. If you don't use Skype, then there shouldn't be any more problems. If you use it, first go to its settings and uncheck the “Use ports 80 and 443 as incoming alternative” checkbox. Then restart Skype. Check your Skype settings - they should look like this.
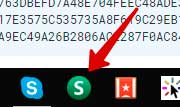
After starting the program in command line a red flag will appear. ![]() Click on it and you will see the server menu. Click on the green checkbox next to which it says “Start server”. The program will create virtual disk W:. Congratulations, you have in your hands a full-fledged server with all the capabilities that real high-quality hosting provides.
Click on it and you will see the server menu. Click on the green checkbox next to which it says “Start server”. The program will create virtual disk W:. Congratulations, you have in your hands a full-fledged server with all the capabilities that real high-quality hosting provides.
 What I will write next will probably cause indignation among professional webmasters. But I’ll take the risk of describing the easiest way to start your own experiments with code; we’ll leave more complex options for later. According to the rules, working with the site begins with creating a user and a database. Of course, if we are doing a real project, this is what we need to do. For us, experimenters with playful hands, OpenServer has already created a user with the name mysql, a database with the name mysql and the password mysql. All we have to do is create a new domain. To do this, click on the “Settings” menu and select the “Domains” tab. In the “Domain name” field, enter any name (it is not advisable to repeat the name of the real site), in the “Domain folder” field, write “localhost/www” and click on “Add”.
Further actions are standard. Load WordPress into the OpenServer\domains\localhost\www folder, open the wp-config file and enter the user and database names and passwords there.

We save, then in the browser we type the name that we entered as a new domain, and we get to regular page WordPress installations. Don't forget to write the address correctly here. email and don't allow indexing. After this, the new website is at your complete disposal. You can do whatever you want with it. For example, I test all new themes on it. It’s even better to install a working website theme on it and test plugins, widgets and scripts. You can remove unwanted links from the template code before installing it on your production site. You can use OpenServer as a testing ground for learning HTML, CSS and PHP. You can practice moving sites, come up with new pages, and so on and so forth. You can test your own themes and see them in any browser. And most importantly, there is absolutely no risk of ruining an already working site.
In fact, OpenServer is immeasurably richer in capabilities. There, in the menu, there is documentation where everything is described in detail. I just wanted to show a simple path to self-improvement and gaining practical work skills. After all, the one who doesn’t dream of becoming a webmaster is bad!
First, let's figure out what OpenServer is and why it is needed. OpenServer is a program, or rather local server, with the help of which you can create or edit websites on your computer and then upload ready-made or modified ones to hosting. That is, if you are going to create your first website, then first you do not have to buy a domain and hosting; in this program you can create as many websites as you like and do various experiments completely free of charge!
Using it, it is very convenient to make changes on your website without affecting the working version, because the files will be located on your PC, and not on the hosting, since if you start changing something on your working version on hosting, then you can simply alienate your audience, because at the moment when you make changes, they will not be able to understand what is happening with your site and will most likely leave it, because it often happens that while making changes, the site sometimes stops work. At first I did this myself until I learned about this method.
So, first you need to download this program on the official website, on the download page, select the maximum version “Ultimate” as it has more features, the free download is currently at low speed, at maximum speed it will be available to you if you make a donation, I contributed 100 rubles to the author (as a token thanks) and downloaded at the maximum speed available to me.
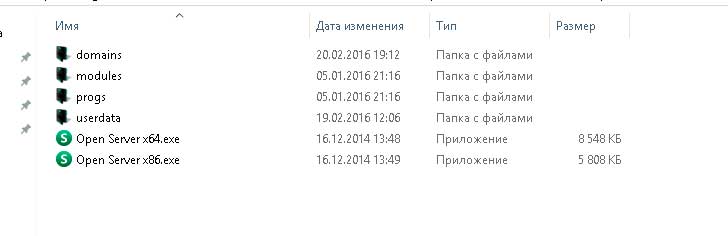
After you download and install the program, I want to show you one important detail, go to the “OpenServer” folder
it will contain 4 folders, we are interested in the “domains” folder; this is where our sites are stored

here's my example

that is, first you need to create a folder with the name of the site, for example test.local
 ending after site name local is mandatory! Otherwise, there may be problems with the operation of the site on the local server, then we put it in this folder installation files engines (wordpress, joomla, drupal, etc.) I will show you using the example of the CSS engine of Wordpress.
In our case, you need to go to the official website and download the engine itself

as soon as we have downloaded the archive, we need to unzip it, after unzipping we will have a folder with files, we need to move these files to the test.local folder, or you can move the folder itself and rename it to test.local.
Now we need to install this engine, we need to launch this program by clicking on the green label corresponding to the bitness of your OS, I have 64-bit, which means I run “Open Server x64”

I advise you to immediately remove the “OpenServer” folder itself so that it is immediately in front of your nose)). A red flag will appear at the bottom, this indicates that the program has started, but for it to function, you need to select the green flag and click run. After launch, we will have a list of sites in the “my sites” section that are in the “domains” folder. Before installing the site, we definitely need to create a database; to do this, go to the “OpenServer” profile and in the menu that opens, select “Advanced > PhpMyAdmin”, then a separate browser window will open (which is set by default in your system, in my case it is Google Chrome) an authorization window will open
 It is not necessary to enter a password here, the most important thing is that it should be root in the “user” column (sometimes there are cases when you cannot log in without a password, then we also write root in the password column).
Once you are logged into the PhpMyAdmin control panel, we need to click on “Users” at the top

At the bottom you need to find the word “add user”

here we will create new base data for our website. Here we write the name of the database, preferably it matches the name of the site without a domain, come up with a password and at the bottom check the box “Create a database with the same name and grant all privileges to it.”

Once we have created the database, we can begin installing our engine; you can read about how to install WordPress in this article.
That's all, in this article I tried to tell as much as possible about my personal experience about the work of OpenServer. If you still have questions, write in the comments, I will help everyone.
Articles in the same category
Concise and easy to understand OpenServer installation. Here we will configure the Database correctly and make WordPress installation to local Open Server.
This local server is free, for which many thanks to the developers. These modest guys, however, do not intrusively offer to make a donation of any amount for the development of the project. I think this is very noble towards us and I think this donation should be made.
Download the Open Server program
You can download Open Server at . The downloaded archive is self-extracting. At startup you will be asked to select a location for unpacking. You can specify any location, even external media in the form of a flash drive or portable hard disk.Also, during installation there will be no shortcut on the desktop and in the start menu. The program is portable.
Choose any of the three distributions, I described them in.
Fill out the captcha and download.
After installation the folder will look like this
I advise you to install a shortcut in the taskbar. It will be convenient to launch the program.
Don't look for the program in Program Files, you won't find it there. It, as I already said, is portable and runs only from the folder where you installed it. Therefore, the shortcut should only be looked for there.
Put the meme on the shortcut in the taskbar and wait a while. The program will not show any signs of its operation when loading its necessary files. After a minute, a yellow flag will quietly appear in the tray (bottom right, near the date and time).
If it does not appear, click the arrow next to it, find the checkbox, after which the server will boot, and now by clicking the green flag in the tray, start Open Server. 
A small but essential step. If you use Skype, you need to log into it, and go to settings, Tools - Advanced - Connection, and uncheck the checkbox, as in the screenshot 
This will allow the Open Server to run without problems occupying its ports.
And one more thing. The server will create a virtual disk for itself, so don't be surprised if you see an additional disk in Explorer. It will disappear when you log out of the local server.
Creating a website in Open Server
Now you need to go to the folder where you defined the location for Open Server. Open the domians folder, you will have one localhost folder there.Create a new one, for example test.ru .
And now we will install the engine on this domain wopdpress.
First of all, download WordPress from the official website.
The archive that you unpack in the same folder will be downloaded Downloads and open the unpacked folder.
Select all folders and files and copy to the clipboard. Then open your new site folder test.ru
and paste all these folders there. 
Then open the file from this folder under the name wp-config-sample.php text editor Notepad++ or just use notepad and edit the code. 
Now, in order, what we edit.
But first we will create a Database. To do this, we will take a break from editing, and then we will return to this step. It is important to create the Base, because we will enter the name of the Base in this batch file.
Database Installation
We go to the Open Server menu by clicking on the flag in the tray and open PhpMyAdmin in the server menu itself.
A login window will open, where in the User window we enter root, leave the password blank, OK.
We entered the program where we will create a database for our virtual site 
We assign the name base, in our case mywordpress, and set the database format utf8_general_ci. Create.
We have created a Database for our website.
Now we return to editing the file from where we were distracted to create the Database.
Fill in the same way as the red squares are highlighted. Except for the big one.
This is our unique arbitrary code. You can create it by following the link indicated by the arrow. Just copy the URL and open it in a new window, you will be prompted unique code, which you copy and replace the one you had by default. All.
Save your changes and close Notepad or other editor in which you are editing the code.
Now change the file name from wp-config-sample.php on wp-config.php.
That's it.
Go to tray, restart (yellow flag) server THIS IS A MUST!
Then log into the server again, still in the same tray, and go to My Sites. There you will find your test.ru.
Click and you are on the site. The WordPress engine installation will start. Give the site a name, for example My blog
. Just create a login admin5. And the password. Make it simple, this is a test site after all and we are not afraid of hacking. 

After which we can dial test.ru/wp-admin, enter our username and password 
And we get to the admin panel 
And if we type in the address bar test.ru
then we'll get to the site 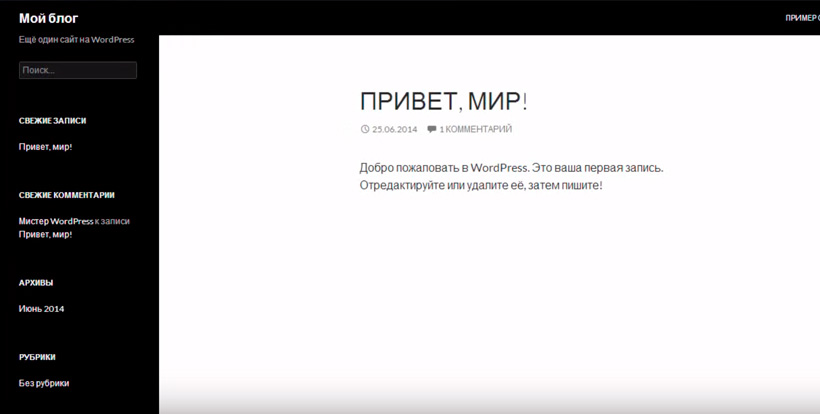
Our local server with the new test site is ready. Let's get started with work and further training.
And all the best!
Work hard! The world will not be a paradise for those who want to live as lazy people. Sachs Hans
Did you know that to make a website, you don’t have to immediately buy a domain and hosting for it? You can get by by installing a special set of programs for Windows - a local server.
I consider Open Server to be one of the best options, or rather its version OSPanel Premium.
This free version includes only the necessary set of programs to work with a local server.
Download, install, by default the program is installed on the C:\OSPanel drive, go there and create a shortcut for exe file, corresponding to the version of your Windows, it can be viewed in the computer properties. If Windows is 64bit, create a shortcut for it (Open Server x64.exe). Next, in the shortcut properties you need to specify run as administrator, this is important. Let’s launch, a red flag appears in the system tray, click on it and then on the green one – Run. We wait a little, if the flag turns green - you are very lucky, if not - most likely the reason is antivirus program, which does not allow you to change system file hosts. There is no universal recipe for all antiviruses, but what we can do is add our server to the trusted antivirus applications, or disable tracking hosts file. Here either Google can help you, or we remove your antivirus and install, for example, the free Kaspersky Free Antivirus, add our Open Server x64.exe to the trusted ones, everything should work.
When the checkbox is green, the server is running. Go to the settings on the modules tab and select Apache-2.4-x64, PHP-5.6-x64, MySQL-5.6-x64, if Windows is 32-bit, then install the same versions without x64. All other checkboxes are unchecked. These settings are optimal today for most popular CMS (Worldpress, Joomla, Prestshop, OpenCart...). We restart, everything is ready to go if the flag is green. If not, write in the comments and I’ll help.
Installing any CMS on Open Server
Many popular CMS engines such as Worldpress, Joomla, Prestshop, OpenCart... are installed in approximately the same way.
I want to see everyone? Yes, easily, here is a universal instruction:
Download the CMS. We go to ospanel\domains through the menu - Folder with sites or through Explorer, create a folder there with a local domain name, for example: presta-pro.ru, unpack our CMS there, directly to the root, after unpacking we have a bunch of files in this folder and not one more folder.
Through the OpenServer menu (when the flag is green) click – Advanced – PhpMyAdmin, User:root, Password: (leave empty). In the menu on the left, click – Create database
Name: (database name in Latin, for example:) namedb, Comparison: utf8_general_ci, click – Create.
During installation you will be asked to provide:
- Database name: (previously created) namedb
- DB password: empty, I hope you can fill in the rest of the fields yourself, but maybe the host can also request: localhost
- After installation, some CMS ask you to delete the install folder, it is located in the root of our site, you need to delete it through Windows Explorer.
When completing the installation, it is important to remember three things:
- Path (address) to the admin panel,
- Login (can be an email to log in),
- Password.
The path to the admin panel may be unique, so we bookmark it. It is advisable to remember your login and password using LastPass.
That's it, congratulations, you have just created a website, or maybe several at once. The advantage from an SEO point of view of this approach is that search engines they don’t like crude and unfinished sites, but on a local domain you can bring the site to a working state and only then upload it to the Internet, to hosting. Yes, you can practice and choose a CMS to your liking. And in the following articles we will look at setting them up in more detail.
P.S. Setting up Open Server + Dr.Web
After starting Open Server, a couple of Dr.Web windows will pop up, in which we allow OpenServer and Apache access, but then dr.web still does not allow Open Server to start. To open additional settings, you need to click on the closed lock icon, then the gear, then allow changes to the host file for OpenServer, as in the photo below, after which the server started.

P.S. Setting up Open Server + Avira
Another good antivirus, including a good one free version you can easily make friends with OpenServer. Launch the antivirus, click the gear in the lower left corner, and uncheck the box in the settings, as in the picture.